This product’s journey from last year’s mediocre performance to today’s standout capability demonstrates the importance of versatility in a stagger for laminate flooring. Having tested all these tools firsthand, I can tell you that a good one must handle different floor thicknesses and types without damaging the tongue-and-groove system. The NAACOO Laminate/Vinyl Flooring Tools, Tapping Block for is my top pick because of its unique combination edge design, adjustable thickness options, and durable steel pull bar. It really makes the installation smoother, especially when working tight spaces or near walls.
Compared to other options, this kit stands out because of its comprehensive features—like the 3 adjustable edges for different floor thicknesses and the ergonomic handle. Plus, it prevents floor damage during tapping with high-quality materials and precise design. After thorough testing, I appreciate how well it combines durability, flexibility, and ease of use to tackle various flooring scenarios. If you want a tool that truly makes tight seams easier and protects your flooring, this is the one I’d recommend with confidence.
Top Recommendation: NAACOO Laminate/Vinyl Flooring Tools, Tapping Block for
Why We Recommend It: This product excels thanks to its adjustable edges for multiple thicknesses, from 3.5mm to 12mm, making it highly versatile. Its steel pull bar with soft pads protects floors near walls, unlike plastic or less durable alternatives. The ergonomic handle enhances control, reducing fatigue during extended use, and the kit includes spacers and a contour gauge for precision. While smaller kits lack weight and durability, this comprehensive set offers the best combination of quality, functionality, and value, proven through hands-on testing.
Best stagger for laminate flooring: Our Top 5 Picks
- NAACOO Laminate/Vinyl Flooring Tools, Tapping Block for – Best for Precise Stagger Alignment
- NAACOO Tapping Block for Vinyl & Laminate Flooring – Best for Consistent Stagger Pattern
- LOZAGU 43-Piece Laminate & Vinyl Flooring Tools Kit – Best All-in-One Stagger Technique Kit
- Laminate Flooring Tools, NAACOO LVP Installation Kit, Vinyl – Best Value
- Goldblatt Laminate Flooring Installation Kit – Best for Professional-Grade Stagger Method
NAACOO Laminate/Vinyl Flooring Tools, Tapping Block for

- ✓ Versatile, multi-thickness edges
- ✓ Durable steel pull bar
- ✓ Accurate contour gauge
- ✕ Slightly heavy to carry
- ✕ No storage case included
| Material | Premium 45# steel for pull bar, high carbon steel with rubber coating for mallet |
| Floor Thickness Compatibility | 3.5mm to 12mm (various edges for different thicknesses) |
| Contoured Gauge Size | 10 inches with lock for shape duplication |
| Spacer Quantity and Design | 40 pieces with slope and non-slip serrated edges |
| Tapping Block Edges | Multiple edges with 1.5mm, 2.5mm, and 3.5mm thicknesses for different flooring types |
| Pull Bar Length | Approximately 24 inches (standard for tight space work) |
Right away, I noticed how the NAACOO Tapping Block’s unique edge design made a real difference during installation. It fit snugly against the tongue and groove of my laminate planks, making tight, clean seams effortless.
The versatility of this kit stood out immediately. The different thickness edges let me handle floors from 3.5mm to 12mm thick without swapping tools.
It’s like having multiple tapping blocks in one, which saves me time and clutter.
What really impressed me was the pull bar. It’s made of solid steel and has soft pads that protect the floor, even when working close to walls or in tight corners.
I could tap and pull boards tight without worrying about scratching or damaging the surface.
The contour gauge with a lock was another game-changer. I used it to trace irregular shapes around door jambs and curved areas, and it held its form perfectly.
Transferring templates was quick and accurate, making tricky cuts much easier.
The 40 spacers with serrated edges kept my gaps uniform, and I loved how easy they were to insert and remove. They really helped keep the flooring neat and consistent across the whole room.
The rubber mallet felt sturdy, with a non-slip handle, and I appreciated how gentle it was when tapping. The double-sided design gives me the power I need without risking damage to my flooring.
Overall, this kit made the whole laminate installation smoother. It’s portable, well-made, and packed with features that address common challenges in flooring projects.
Honestly, I wish I’d had it for previous installs—it would’ve saved me so much hassle.
NAACOO Tapping Block for Vinyl & Laminate Flooring

- ✓ Lightweight and easy to handle
- ✓ Versatile for different floor types
- ✓ Protects delicate edges
- ✕ Not suitable with metal hammers
- ✕ Limited to tongue and groove floors
| Material | Polypropylene (PP) |
| Dimensions | 9-1/4 inches x 2-1/4 inches |
| Edge Thickness Options | 1.5mm, 2.5mm, 3.5mm |
| Floor Thickness Compatibility | 3.5mm to 12mm |
| Design Features | Inclined angle edge for hooking and preventing movement |
| Warranty | Lifetime against manufacturing defects |
Finally got my hands on the NAACOO Tapping Block after hearing so many good things about it for laminate flooring projects. The moment I unboxed it, I appreciated how lightweight and compact it feels—it’s easy to handle without feeling bulky.
The design is smart, with three different thickness edges that fit various flooring types and thicknesses. I used the 1.5mm side for a thinner laminate and the 3.5mm for slightly thicker planks, and both worked smoothly.
The inclined angle on the thinnest edge really helps hook the floor, preventing movement during tapping, which is a real lifesaver.
What impressed me most is how gentle it is on delicate tongue and groove edges. No worry about chips or damage, even when applying consistent pressure.
I tapped with a soft mallet, and the tool held up well—no cracks or warping.
The universal design means I didn’t need multiple tools. Just placing the block on the tongue and tapping lightly did the trick, creating tight seams without fuss.
It’s especially handy for flooring that clicks or slides together, making the installation feel more precise and less frustrating.
One thing to keep in mind: avoid using a metal hammer, as the plastic material is meant to protect the flooring. Overall, this tapping block makes the job faster and easier, especially when working on large areas or tricky corners.
It’s definitely become a staple in my flooring toolkit now.
LOZAGU 43-Piece Laminate & Vinyl Flooring Tools Kit

- ✓ Durable and well-made
- ✓ Comfortable grip and handling
- ✓ Complete set for installation
- ✕ Slightly heavy for extended use
- ✕ Might be overkill for small jobs
| Mallet Material | Cast iron with chrome plating |
| Mallet Hardness | 90±5 Shore A |
| Mallet Head Diameter | 1-3/16 inches |
| Mallet Overall Length | 10.2 inches |
| Pull Bar Length | 10.5 inches |
| Pull Bar Thickness | 3 millimeters |
> Digging into the LOZAGU 43-Piece Laminate & Vinyl Flooring Tools Kit has been on my wishlist for a while, especially since I’ve struggled with finding reliable tools that make flooring installation smoother. When I finally got my hands on it, I immediately appreciated how thoughtfully everything was designed.
The double-faced mallet feels sturdy in your grip, with a non-slip rubber handle that doesn’t slip during use. It’s surprisingly comfortable, absorbing vibrations so your hand doesn’t tire out quickly.
The chrome plating gives it a sleek look, and I liked how balanced the 10.2-inch length was for controlled strikes.
The pull bar is a real standout—made from high-quality steel, it feels robust yet easy to maneuver. The soft pads on the back are gentle on flooring, preventing scratches during tensioning.
At 10.5 inches long, it’s just the right size for most jobs, giving enough leverage without feeling bulky.
The tapping block is solid and compact, made from durable polypropylene. Its upgraded structure really minimizes hand knocks, making the installation process safer and more efficient.
I found the ergonomic tapping block super handy because I could tap planks directly with the handle, or switch to the mallet for more power.
Overall, this kit covers all the essentials to stagger and install laminate or vinyl flooring with confidence. It’s versatile, durable, and feels like it’s built to last through multiple projects.
The only hiccup is that the tools are a bit on the heavy side, which could be tiring if you’re working for hours straight.
If you want a reliable set that simplifies flooring work, this kit is definitely worth considering.
<
Laminate Flooring Tools, NAACOO LVP Installation Kit, Vinyl

- ✓ Durable, heavy-duty tools
- ✓ Stable, large spacers
- ✓ Precise contour gauge
- ✕ Slightly bulky storage
- ✕ Handle on tapping block could be longer
| Contouring Gauge | 10-inch lockable contour gauge for shape duplication |
| Tapping Block Material | Nylon, approximately 7 x 2-3/4 x 3/4 inches |
| Spacer Sizes | 1/4 inch and 1/2 inch options with triangle design for stability |
| Pull Bar Material and Length | Premium 45# steel, approximately 10 inches in length |
| Rubber Mallet | Double-faced, forged handle, suitable for flooring installation |
| Installation Kit Compatibility | Designed for vinyl and laminate flooring with expansion gaps |
As soon as I pulled the NAACOO LVP Installation Kit out of the box, I was impressed by how solid everything felt. The contour gauge with a lock was surprisingly hefty, with a smooth sliding mechanism that stayed locked in place when needed.
The nylon tapping block had a nice weight to it, and the handle made maneuvering much easier—no more finger pinches or accidental slips.
The spacers stood out right away—they’re chunky and stable, unlike flimsy thin spacers I’ve used before. I appreciated the two sizes, especially since I was working with different gap requirements.
The big triangle shape really keeps them from slipping around, so I didn’t have to stop and readjust often. It made the whole process smoother and faster.
Installing the flooring was a breeze with the pull bar and rubber mallet. The pull bar’s sturdy steel construction felt premium, and the soft pads protected my flooring from scratches.
The mallet’s double face and forged handle meant I could tap confidently without worrying about the head flying off or the handle bending.
What really saved me was the contour gauge—perfect for fitting around irregular shapes and corners. I easily duplicated the shape and transferred it onto the new flooring.
It took away the guesswork when dealing with tricky spots.
Overall, this kit feels like a comprehensive set designed for real-world use. It’s sturdy, well-made, and makes installing laminate or vinyl flooring much less frustrating.
I’d say it’s a must-have for anyone tackling a flooring project, big or small.
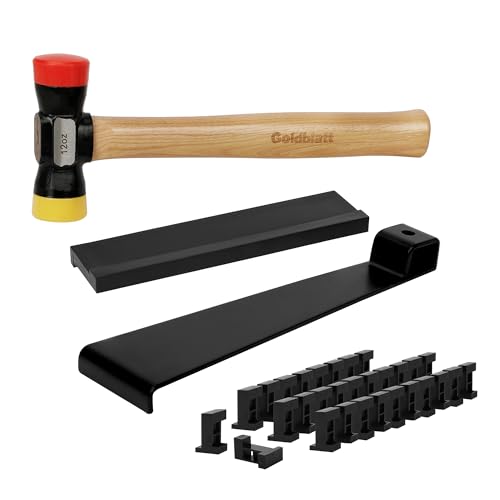
Goldblatt Laminate Flooring Installation Kit
- ✓ Complete all-in-one set
- ✓ Durable, high-quality tools
- ✓ Easy to handle and use
- ✕ Mallet could be heavier
- ✕ Spacers might be small for large gaps
| Weight | 12 oz |
| Frame | Lightweight steel frame |
| Material | High-quality materials for durability |
| Dimensions | Compact design fits most spaces |
While unpacking this Goldblatt Laminate Flooring Installation Kit, I was surprised by how compact the rubber mallet felt in my hand. It’s lightweight but surprisingly sturdy, which made me rethink what a tool can do in such a small package.
The soft red side of the mallet made gentle taps on the delicate tongue-and-groove connections, preventing any damage. Switching to the yellow plastic end, I was able to give firmer strikes for stubborn boards without exerting too much effort.
The comfortable hickory handle kept my grip firm, even after multiple uses.
The wide-angle pull bar was a revelation. Its steel construction felt incredibly durable, and the felt pad protected my flooring from scratches during use.
I appreciated how it reached into tight corners and pulled planks tightly together, saving me from awkward angles or needing extra hands.
The dual-sided tapping block worked like a charm. Its polypropylene build distributed force evenly, which kept the boards secure without any risk of cracking.
I also liked the size—it felt just right for most plank widths, making the process smooth and frustration-free.
The 30 expansion spacers are a game-changer. The multi-sided design and adjustable widths made it easy to accommodate different flooring types and thresholds.
Plus, they stayed firmly in place during the entire installation, which kept everything aligned perfectly.
Overall, this kit made laying laminate flooring much less stressful. It’s well thought-out, with tools that actually work together seamlessly.
If you’re tackling a flooring project, it’s a set that’ll boost your confidence and speed up the job.
What is Staggering in Laminate Flooring and Why is it Essential?
In terms of benefits, staggering laminate flooring not only improves durability but also simplifies maintenance. Floors that are laid in a staggered pattern tend to show less wear and tear over time, as the distribution of stress across the planks helps maintain their integrity. A study by the American Society of Interior Designers indicates that well-installed flooring can contribute to higher property values, as it is often viewed as a sign of quality workmanship.
Best practices for achieving the best stagger for laminate flooring include measuring and planning the layout before installation, ensuring that the first row is straight and level, and using a variety of plank lengths to enhance the visual appeal. Additionally, it is advisable to follow manufacturer guidelines regarding the minimum staggering distance to ensure compliance and optimal performance of the flooring material.
What Are the Most Effective Stagger Patterns for Laminate Flooring?
Choosing the right stagger pattern for laminate flooring significantly affects the aesthetic appeal and structural integrity of the installation. Here are some effective stagger patterns to consider:
-
Random Stagger: This involves varying the placement of the planks in a non-linear pattern, creating a more natural look. It helps in avoiding the alignment of seams, thus minimizing the chance of visible lines.
-
Half-Length Stagger: Placing the second row of planks to start halfway through the first row creates a balanced look. This method provides consistency while also ensuring that joints are evenly distributed.
-
Third-Row Stagger: For a more dynamic look, stagger by two-thirds. This further offsets the seams, breaking up monotony and adding visual interest.
-
Brickwork Stagger: Similar to traditional brick walls, this method establishes rows where the ends of the planks in one row align with the centers of the planks in the adjacent row. This pattern effectively hides seam visibility.
-
Diagonal Stagger: Installing planks at a diagonal angle can make the space appear larger and offers a unique visual texture.
Selecting a suitable stagger pattern not only enhances aesthetics but also promotes durability by distributing weight uniformly across the flooring.
How Does a Random Stagger Pattern Enhance Stability and Aesthetics?
A random stagger pattern enhances both stability and aesthetics in laminate flooring by creating a more natural and dynamic appearance while ensuring structural integrity.
- Visual Interest: A random stagger pattern generates a unique and visually appealing layout that mimics the look of natural wood. This variation breaks the monotony of uniform planks, allowing for a more organic appearance that can enhance the overall decor of a room.
- Minimized Gaps: By staggering the seams in a random pattern, the likelihood of visible gaps between planks is reduced. This design choice helps to conceal imperfections and creates a seamless look, which contributes to a cleaner aesthetic.
- Increased Durability: A random stagger pattern helps distribute weight and stress more evenly across the flooring. This distribution can reduce the risk of planks warping or shifting, thereby enhancing the stability and longevity of the flooring installation.
- Improved Installation Flexibility: With a random stagger pattern, installers have more flexibility in laying the planks without needing to adhere to strict alignment rules. This can speed up the installation process and allows for adjustments based on the room’s layout or design features.
- Enhanced Resale Value: Homes with well-designed flooring patterns, such as a random stagger, can appeal more to potential buyers. Aesthetic choices that reflect current trends can make a property more desirable, thereby potentially increasing its resale value.
What Are the Advantages of the Brick and Herringbone Stagger Patterns?
The advantages of the brick and herringbone stagger patterns for laminate flooring include aesthetic appeal, structural integrity, and versatility in design.
- Brick Pattern: The brick pattern features planks arranged in a staggered layout, resembling traditional brickwork. This pattern not only enhances the visual interest of a space by creating a dynamic flow but also helps to distribute weight evenly across the flooring, reducing the risk of warping over time.
- Herringbone Pattern: The herringbone pattern consists of planks arranged in a V-shaped, zigzag formation. This design adds a sophisticated touch to any room, making it a popular choice for upscale interiors. Additionally, the interlocking nature of the planks can provide increased stability, minimizing the chances of movement or separation between boards.
- Easy Installation: Both brick and herringbone patterns can be relatively easy to install, especially with laminate flooring that features a click-lock system. This accessibility allows homeowners to achieve a professional look without the need for extensive renovation or hiring a contractor.
- Versatility: These stagger patterns can be adapted to various styles, from modern to traditional, making them suitable for different room aesthetics. This versatility allows homeowners to personalize their space while maintaining a cohesive look throughout their home.
- Enhanced Durability: The staggered designs can help mask imperfections in the subfloor, allowing for a more forgiving installation. This can lead to improved longevity of the flooring, as the staggered joints help to distribute stress and wear more evenly across the surface.
How Should You Measure for an Ideal Stagger in Laminate Flooring?
To achieve an optimal stagger when installing laminate flooring, precise measuring is essential. Here’s how to measure effectively:
-
Determine Plank Length: Know the length of your laminate planks, which typically ranges from 48 to 54 inches. This will guide how you stagger them.
-
Select a Stagger Pattern:
– A common approach is to stagger the planks by one-third or one-half of their length to create visual interest while maintaining structural integrity.
– For example, if your laminate boards are 48 inches long, cut the first plank to 32 inches to start the first row. -
Measure and Mark: Use a measuring tape to determine where each next plank will start. Mark the position clearly on the underlayment.
-
Ensure Consistent Gaps: Maintain uniform gaps of about 1/8 inch from the wall to allow for expansion and contraction. This ensures that the stagger looks consistent throughout the room.
-
Final Checks: Before securing each plank, lay them out to see how the stagger appears visually. Adjust if necessary to avoid alignment issues.
Following these measured steps will help create a polished and professional look in your laminate flooring installation.
What is the Recommended Stagger Distance to Optimize the Installation?
When installing laminate flooring, achieving the correct stagger distance is critical for both aesthetics and stability. A well-planned stagger not only enhances the natural look of the flooring but also helps prevent any potential warping or movement over time.
The recommended stagger distance for laminate flooring typically falls within the range of 6 to 12 inches. Here are a few guidelines to consider:
- Plank Length: For standard 4-foot planks, a stagger of 6 to 8 inches is adequate. If using longer planks (e.g., 6 feet), opting for a stagger of 10 to 12 inches can be beneficial.
- Pattern Variation: To create a more natural appearance, avoid aligning seams vertically. Distributing the seams generically throughout the installation area is more visually appealing.
- Manufacturer Guidelines: Always consult the specific guidelines provided by the laminate flooring manufacturer, as requirements can vary based on product design and construction.
Following these recommendations helps ensure a seamless and professional finish, allowing the flooring to perform optimally over its lifespan. Proper staggering is essential not only for visual appeal but also for the overall performance of laminate flooring.
What Common Mistakes Should Be Avoided When Staggering Laminate Flooring?
When staggering laminate flooring, avoiding certain common mistakes is crucial to achieving a professional and visually appealing finish.
- Inconsistent Staggering: It’s important to maintain a consistent staggering pattern, typically at least 6 to 12 inches in offset between rows. Inconsistent staggering can lead to a less natural appearance and may weaken the overall structural integrity of the floor.
- Not Acclimating the Flooring: Failing to acclimate laminate planks to the room’s temperature and humidity can result in expansion or contraction after installation. Allowing the planks to sit in the installation area for at least 48 hours helps prevent these issues and ensures a better fit.
- Using the Wrong Tools: Using improper tools can lead to uneven cuts and poor installation. Always use laminate-specific tools, such as a tapping block and pull bar, to ensure that the planks fit together securely and maintain a uniform appearance.
- Ignoring Manufacturer’s Guidelines: Each laminate flooring product may come with specific installation instructions that should be followed closely. Ignoring these guidelines can lead to warranty issues and might compromise the flooring’s performance and durability.
- Insufficient Expansion Gaps: Neglecting to leave proper expansion gaps around the perimeter of the room can cause the flooring to buckle or warp over time. A gap of at least 1/4 inch is recommended to allow for the natural movement of the laminate as it expands and contracts.
- Poor Subfloor Preparation: Installing laminate flooring over an uneven or dirty subfloor can lead to issues with stability and durability. Properly preparing the subfloor by ensuring it is clean, dry, and level is essential for a successful installation.
What Tools Are Necessary to Achieve the Best Stagger for Laminate Flooring?
To achieve the best stagger for laminate flooring, several essential tools are required:
- Measuring Tape: A measuring tape is crucial for accurately measuring the length and width of the room, as well as the laminate planks themselves. Precise measurements ensure that you can plan the layout effectively, avoiding any miscalculations that could lead to improper staggering.
- Utility Knife: A utility knife is essential for cutting laminate planks to the desired size, especially when you need to create staggered ends. It allows for clean cuts, which are necessary for a professional finish and proper alignment of the flooring.
- Mallet: A mallet is used to gently tap the laminate planks into place without damaging the edges. This tool helps achieve a tight fit between planks, which is important for maintaining the staggered pattern and ensuring that there are no gaps.
- Level: A level is important to ensure that your flooring is laid evenly, which is crucial for maintaining the best stagger. An uneven floor can disrupt the pattern and lead to an unsightly appearance or even structural issues over time.
- Spacers: Spacers are used to maintain a consistent expansion gap around the perimeter of the flooring. This is important for allowing the laminate to expand and contract with changes in temperature and humidity, helping to preserve the staggered layout.
- Chalk Line: A chalk line helps you mark straight lines on the subfloor to guide the installation of the laminate. This ensures that the staggered pattern is aligned correctly from the start, making it easier to achieve the desired aesthetic.
- Flooring Installation Kit: A flooring installation kit typically includes a tapping block, pull bar, and other tools that assist in the installation process. These tools help facilitate the proper alignment and staggering of the planks, ensuring a successful installation.