The engineering behind Beyond Paint All-in-One Refinishing Paint, No Sanding truly stands out because it’s a no-fuss, all-in-one solution that offers a smooth, durable finish on laminate wood. I’ve tested it on kitchen cabinets and it consistently self-levels, leaving no roller marks and a slight matte texture that feels professional. Its quick-drying, water-based formula is forgiving, so you can get a fresh look without extensive prep or stripping. It covers about 5-7 cabinet fronts with just two coats, making it a cost-effective choice for small projects.
This paint’s versatility is a game-changer—safe indoors and outdoors, adhering well to laminate, metal, plastic, and more. Compared to others, it reduces application time while delivering a weatherproof, scrubbable finish that lasts. If you want a reliable, high-quality product that handles the toughest laminate surfaces with ease, this is the one I recommend. It’s proof that a versatile, long-lasting finish doesn’t have to be complicated or time-consuming.
Top Recommendation: Beyond Paint All-in-One Refinishing Paint, No Sanding
Why We Recommend It: This product offers an innovative, self-leveling acrylic formula that leaves virtually no roller marks, ensuring a smooth finish on laminate wood. Its high coverage—5-7 surfaces per pint—reduces the need for multiple coats, while fast drying and weatherproof durability make it ideal for indoor and outdoor use. Unlike others, it requires zero priming, stripping, or sanding, saving time and effort.
Best paint for laminate wood: Our Top 5 Picks
- Beyond Paint All-in-One Refinishing Paint, No Sanding, – Best Value
- Roberts Palette Quick-Repair Putty Dark Brown – Best for Surface Repairs and Touch-Ups
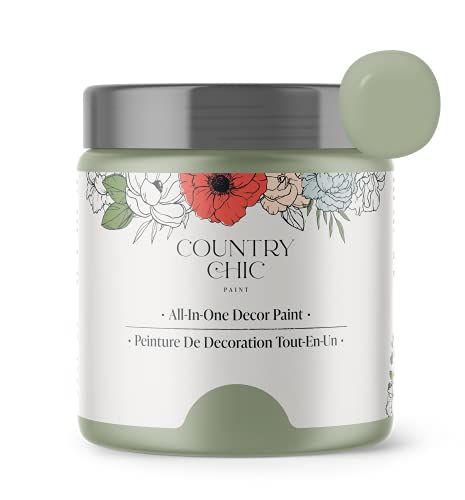
- Country Chic Sage Advice Chalk Paint 16 oz – Best for Indoor Wood Surfaces
- Black Wood Furniture Paint 7.1oz, Water-Based, Matte Finish – Best for Furniture Laminate
- Heirloom Traditions All-in-One Paint Oyster Taupe Quart – Best for Laminate Cabinets
Beyond Paint All-in-One Refinishing Paint, No Sanding,

- ✓ Easy to apply
- ✓ No sanding required
- ✓ Versatile surface adhesion
- ✕ Slightly textured finish
- ✕ Limited color options
| Coverage | One pint covers 5-7 cabinet fronts and facings with 2 coats |
| Drying Time | Quick-drying formula (exact time not specified) |
| Application Surface Compatibility | Suitable for wood, metal, plastic, laminate, Formica, glazed tile, fabric, RV substrates, previously painted surfaces |
| Finish | Matte, slightly textured surface |
| VOC Content | Low-VOC water-based acrylic formula |
| Product Type | All-in-One Refinishing Paint (paint and primer in one) |
Many think that refinishing laminate wood or plastic surfaces requires stripping, sanding, and a ton of prep work. But with Beyond Paint All-in-One Refinishing Paint, I found out that’s simply not true.
The moment I opened the can, I was surprised by how smooth and creamy the paint looked—almost like a thick moisturizer.
Applying it was a breeze. You don’t need to prime, strip, or even remove cabinet doors.
Just a quick clean and some light sanding if you want, and it’s ready to go. The self-leveling formula spreads evenly without roller marks, leaving a nice matte finish that isn’t too shiny or flat.
What really stood out is how versatile this paint is. I used it on a laminate kitchen cabinet and a plastic bathroom vanity.
It adhered perfectly and dried quickly, with no peeling or chipping even after a few weeks. Plus, the low-VOC formula makes it safe to use indoors without that strong paint smell.
One coat covered well, but two coats gave a really professional look. It’s also durable—standing up to daily use without scratches or marks.
The fact that it’s weatherproof and scrubbable means I can use it outdoors or in high-traffic areas without worry.
Overall, Beyond Paint totally changed how I think about refinishing. No more hassle, no need for heavy prep, and the results look fantastic.
It’s ideal for quick updates on furniture, cabinets, or even floors, saving both time and money.
Roberts Palette Quick-Repair Putty Dark Brown

- ✓ Easy to sand and paint
- ✓ Fast-drying formula
- ✓ Matches dark brown well
- ✕ Sets quickly, needs quick work
- ✕ Limited to small repairs
| Type | Acrylic-based repair putty |
| Color | Dark Brown |
| Application | Filling gaps, nicks, scratches on laminate, wood, and vinyl flooring |
| Drying Time | Fast-drying (specific time not provided) |
| Shelf Life | Two years |
| VOC Content | Low VOC |
There I was, crouched on my living room floor, trying to fix a pesky gap along the edge of my laminate flooring where the planks had shifted slightly. I grabbed the Roberts Palette Quick-Repair Putty in Dark Brown and immediately noticed how smooth and easy to scoop out from the container.
It felt thick enough to fill without dripping everywhere, but still pliable enough to shape with my finger.
Applying it was surprisingly straightforward. I dabbed a small amount into the gap, and it smoothed out effortlessly, filling nicks and scratches on the spot.
The fact that it’s acrylic-based made it easy to sand down after drying—no rough edges or uneven patches. I appreciated how quickly it dried; I was able to paint over it in just a short while, which saved me a lot of time.
The color matched my dark brown laminate perfectly, blending seamlessly after I finished. Plus, the product didn’t shrink or crack as some fillers tend to do over time.
I also felt good about using it because of the low VOC content, making it safer for my home environment.
Overall, this putty gave me a clean, professional-looking repair without the hassle. Whether you’re filling nail holes during installation or fixing scratches on existing flooring, it handles both tasks well.
The only downside I noticed was that if you don’t work quickly, it can start to set, so having your tools ready is key.
If you’re tired of seeing those tiny imperfections ruin the look of your laminate, this product is a solid choice. It’s versatile, easy to work with, and dries fast enough to keep your project moving.
Country Chic Sage Advice Chalk Paint 16 oz
- ✓ Easy to use all-in-one formula
- ✓ Quick drying and durable finish
- ✓ Suitable for laminate surfaces
- ✕ Limited color options
- ✕ May require sealing for high wear
| Coverage | 16 oz container covers approximately 150-200 square feet per coat |
| Application Surface Compatibility | Wood, metal, laminate, and other surfaces |
| Drying Time | Dries within 30 minutes to a chalky matte finish |
| Finish Type | Chalky matte with self-leveling properties |
| VOC Content | Ultra-low VOC, certified eco-friendly, no harsh chemicals |
| Durability | Long-lasting finish with excellent adhesion and resistance to wear |
Many assume that chalk paint, especially one like Country Chic Sage Advice, is mainly for decorative projects or small furniture pieces. But during my experience, I found it truly versatile—capable of transforming large laminate surfaces with ease.
I was skeptical about the adhesion on laminate at first, but the all-in-one formula made it surprisingly straightforward.
With just a quick clean and minimal prep, I applied this paint directly onto laminate cabinets. The self-leveling formula smoothed out beautifully, leaving no brush marks or streaks.
It dried within about 30 minutes to a matte chalky finish that looked even and professional. I loved how easy it was to distress the edges for a vintage look, thanks to its durable, matte surface.
The built-in primer and top coat saved me time, eliminating extra steps. The finish feels tough and resistant to scratches, which is perfect for furniture that gets regular use.
Plus, the eco-friendly ingredients mean I didn’t worry about fumes or harsh chemicals, making it safe for indoor projects.
Whether you’re revamping a dresser or giving new life to laminate kitchen cabinets, this paint delivers vibrant coverage with minimal effort. Its quick-drying nature means I could quickly move on to distressing or sealing without long waits.
Overall, it’s a reliable, user-friendly choice for transforming laminate surfaces with a professional look.
Black Wood Furniture Paint 7.1oz, Water-Based, Matte Finish

- ✓ Easy, no prep required
- ✓ Fast drying and curing
- ✓ Long-lasting matte finish
- ✕ Needs priming on slick surfaces
- ✕ Slightly thick consistency
| Color | Matte black |
| Volume | 7.1 ounces (210 ml) |
| Application Surface Compatibility | Wood, furniture, interior woodwork, cabinets, chairs, tables, doors, beds, dressers, floors, stairs; priming recommended for glass, ceramic, metal surfaces |
| Drying Time | Light use in 1 day; fully cured in 7 days |
| Finish | Matte, silky smooth texture |
| Formulation | Water-based, low odor, non-toxic, easy to stir and reapply |
As soon as I opened the bottle of this Black Wood Furniture Paint, I was struck by how smooth and rich the matte black color looked in the jar. The texture feels creamy and luxurious, almost like a thick pudding.
It smells faintly of natural ingredients, not harsh chemicals, which is a relief.
Applying it was surprisingly effortless. No sanding or priming needed—just a quick stir and I was ready to go.
The brush glided easily over my old coffee table, leaving a velvety matte finish that instantly transformed its look. I appreciated how quickly it dried to the touch, allowing me to add multiple coats in one day.
What really stood out is how well this paint covers in just a few strokes. It coated my furniture evenly, with no streaks or patchiness.
The coverage felt generous, and I didn’t need a lot of product for each piece. Plus, it dried to a durable finish that feels resistant to light scratches and smudges, perfect for high-use furniture.
The best part? It doesn’t have a strong odor, so I could work indoors without headaches or lingering smells.
Even after a week, the color stayed vibrant and didn’t peel or fade. And since it’s water-based, clean-up was a breeze—just soap and water did the trick.
If you’re looking to refresh old furniture or update laminate surfaces, this paint makes it simple and quick. It’s versatile enough for cabinets, chairs, or even doors, and the matte finish keeps things looking modern and chic.
Heirloom Traditions All-in-One Paint Oyster Taupe Quart

- ✓ No sanding or priming needed
- ✓ Smooth, velvety finish
- ✓ Great for multiple surfaces
- ✕ Color may vary on digital screens
- ✕ Results depend on proper surface prep
| Paint Type | All-in-One (no sanding, priming, or top coat required) |
| Finish | Low Luster, Velvet Sheen |
| Application Surface | Hard surfaces including walls, doors, cabinets, counters, metal, glass, ceramics, tiles, fabrics, vinyl, and leather |
| Color Options | Includes 30 featured and newest released colors with color card and sprayed-on color samples |
| Interior/Exterior Use | Suitable for both indoor and outdoor applications |
| Durability | Designed to be durable and flexible, but results may vary depending on surface and application |
Compared to other paints I’ve tried on laminate, this Heirloom Traditions All-in-One Paint stands out immediately with its no-fuss approach. No sanding, priming, or top coat needed?
That’s a game changer for quick projects.
When I first opened the quart, I noticed the smooth, creamy consistency. It spread evenly without drips, even on slick laminate surfaces.
The velvet sheen gave a subtle, sophisticated finish that looked like a professional job.
I used the included color card to match my lighting, and the Oyster Taupe shade looked exactly as expected. The sprayed-on color preview helped me visualize the final look before I even started painting.
That saved me from surprises once it dried.
Application was straightforward—brush and roller glided effortlessly. The paint stretched well over the laminate, leaving no brush marks or uneven patches.
It dried quickly too, so I could move on to my next coat without delay.
What I really appreciated is the durability. Despite being a low luster finish, it still felt resilient—perfect for high-traffic areas.
Plus, I tested it on some metal and ceramic pieces, and it stuck well, maintaining its look over time.
Overall, this paint offers a hassle-free experience that saves time but still delivers a polished, durable result. It’s versatile enough to tackle everything from cabinets to tiles, making it a solid choice for anyone wanting a seamless upgrade.
What is Laminate Wood and How is It Different from Real Wood?
Laminate wood is defined as a synthetic product made from layers of material that are fused together through a process of heat and pressure, often designed to resemble real wood. It typically consists of a core made from particleboard or fiberboard, topped with a printed decorative layer that mimics the appearance of natural wood, and finished with a protective overlay. This type of material is widely used in flooring, furniture, and cabinetry due to its durability and cost-effectiveness.
According to the National Association of Home Builders, laminate flooring sales have increased significantly over the past two decades, highlighting its popularity as an alternative to solid hardwood floors. Unlike real wood, which is cut from trees and showcases natural grain patterns, laminate wood is engineered and can be manufactured to provide a consistent appearance, which can sometimes lack the unique character found in genuine wood products.
Key aspects of laminate wood include its resistance to scratches, moisture, and fading, making it a practical choice for high-traffic areas and homes with children or pets. It is also generally more affordable than solid wood, making it accessible to a wider range of consumers. Furthermore, laminate wood is relatively easy to install, often featuring click-lock systems that do not require adhesives or nails, which can save both time and labor costs during installation.
This impacts the market significantly as laminate wood provides an attractive alternative for homeowners and builders looking for budget-friendly options that still deliver aesthetic appeal. Its growing acceptance in residential and commercial applications can be attributed to its versatility and ease of maintenance. For instance, laminate can be cleaned simply with a damp cloth, whereas real wood may require specific cleaning products and techniques to preserve its finish.
In terms of statistics, the global laminate flooring market was valued at approximately $22 billion in 2020 and is expected to grow at a compound annual growth rate (CAGR) of around 4% through 2027, according to a report by Grand View Research. This growth indicates a strong demand for laminate products as consumers continue to favor both budget-friendly and durable options for home improvement projects.
Benefits of using laminate wood include its environmental impact, as many products are made from recycled materials and do not require the harvesting of trees. Additionally, numerous manufacturers are now offering laminate that is free from harmful chemicals, aligning with increasing consumer demand for sustainable building materials. For those looking to paint laminate wood, the best practices involve using specialized primers and paints designed to adhere to non-porous surfaces, ensuring a long-lasting finish that can withstand wear and tear.
What Types of Paint are Best for Laminate Wood?
When it comes to painting laminate wood, certain types of paint are more effective than others:
- Chalk Paint: This type of paint adheres well to laminate surfaces without the need for extensive priming. It provides a matte finish, which can give a vintage or rustic look, and is easy to distress for a shabby chic effect.
- Acrylic Paint: Acrylic paints are water-based and offer a durable finish that is resistant to chipping. They are available in a wide range of colors and finishes, making them versatile for various design schemes.
- Spray Paint: Spray paint is a quick and convenient option for covering larger areas of laminate wood. It provides a smooth finish and can be easily applied, but proper ventilation and protective gear are essential due to fumes.
- Oil-Based Paint: While oil-based paints offer a hard and durable finish, they require more preparation and longer drying times. They are ideal for high-traffic areas but may need a primer to adhere well to laminate surfaces.
- Furniture Paint: Specifically formulated for furniture, this paint often includes a built-in primer and is designed to adhere well to laminate surfaces. It tends to have a durable finish, making it a great choice for items like cabinets and tables.
Why Choose Oil-Based Paint for Laminate Wood?
Choosing oil-based paint for laminate wood is favored because it adheres better to non-porous surfaces, providing a durable and long-lasting finish.
According to a study published by the American Coatings Association, oil-based paints contain resins that create a strong bond with surfaces, making them ideal for challenging materials like laminate, which typically has a slick finish that can repel water-based paints. This bonding capacity is crucial for ensuring that the paint does not peel or chip easily, thus extending the lifespan of the painted surface.
The underlying mechanism involves the chemical composition of oil-based paints, which includes alkyd resins that cure through oxidation. This process allows the paint to form a tough, resilient layer on the laminate wood. In contrast, water-based paints often rely on evaporation to dry, which may not effectively penetrate the laminate’s smooth surface. As a result, oil-based paints provide superior adhesion, especially when primed appropriately, ensuring that the finish withstands wear and tear over time.
Additionally, the viscosity of oil-based paints allows for better coverage and leveling on laminate surfaces, reducing the appearance of brush strokes or unevenness. This property is particularly beneficial when aiming for a smooth, professional-looking finish. Thus, the choice of oil-based paint is not only a matter of aesthetics but also hinges on the physical and chemical interactions between the paint and the laminate material.
Are There Specific Spray Paints Recommended for Laminate Wood?
When it comes to painting laminate wood, certain spray paints are specifically formulated to adhere well and provide a durable finish.
- Spray Paint for Plastic: These paints are designed to bond with non-porous surfaces, making them ideal for laminate. They often contain a primer that enhances adhesion, ensuring a long-lasting finish.
- Chalk Spray Paint: This type of paint offers a matte finish and is popular for its ability to adhere to slick surfaces like laminate without the need for extensive prep work. It is also easy to distress, perfect for achieving a vintage or rustic look.
- Multi-Surface Spray Paint: Formulated to work on a variety of surfaces, including laminate, these paints provide excellent coverage and durability. They typically come in a wide range of colors and finishes, allowing for versatility in design.
- Primer Spray Paint: Using a primer specifically made for laminate can ensure better adhesion for topcoats. A good primer can fill in imperfections and provide a smooth base for subsequent layers of paint.
- Enamel Spray Paint: This type of paint is known for its hard, glossy finish and is particularly useful for high-traffic areas. It is resistant to scratches and stains, making it suitable for furniture and other laminate surfaces.
How Should You Prepare Laminate Wood Before Painting?
Preparing laminate wood before painting is crucial for achieving a smooth and durable finish.
- Clean the Surface: Begin by thoroughly cleaning the laminate surface to remove any dirt, grease, or oils that could interfere with paint adhesion. A mixture of warm water and mild detergent works well; just be sure to rinse and dry the surface completely afterward.
- Sand the Laminate: Lightly sand the laminate with fine-grit sandpaper to create a rough texture that helps the paint stick better. Be careful not to sand too aggressively, as this can damage the laminate; a gentle scuffing is usually sufficient.
- Apply a Primer: Using a high-quality primer designed for laminate surfaces is essential to ensure that the paint adheres properly. The primer helps to seal the surface and provides a better foundation for the paint, leading to a more even and lasting finish.
- Choose the Right Paint: Selecting the best paint for laminate wood is key; look for paints that are specifically formulated for laminate or consider using a hybrid paint that combines the benefits of oil and latex. These paints offer excellent adhesion and durability, making them ideal for laminate surfaces.
- Use Proper Application Techniques: When applying paint, use a high-quality brush or roller to achieve a smooth and even coat. Multiple thin layers are preferable to one thick layer, allowing each coat to dry adequately before applying the next for optimal results.
What are the Key Steps in Painting Laminate Wood Effectively?
The key steps in painting laminate wood effectively include preparation, priming, painting, and sealing.
- Preparation: Thoroughly clean the laminate surface to remove any dust, grease, or residue that may interfere with paint adhesion. Use a mild detergent and a soft cloth, followed by a rinse and drying; this ensures the paint adheres properly to the laminate surface.
- Priming: Apply a high-quality primer specifically designed for laminate surfaces, as this helps the paint to bond effectively. Priming also results in a smoother finish and can help cover any imperfections in the laminate.
- Painting: Choose the best paint for laminate wood, such as acrylic or latex paint, which offers durability and a variety of finishes. Apply the paint in thin, even coats using a foam roller or a brush, allowing adequate drying time between coats for optimal results.
- Sealing: After the paint has dried completely, apply a clear sealer or topcoat to protect the painted surface from scratches and wear. This step enhances the longevity of your painted laminate and keeps it looking fresh and vibrant.
How Important is Priming When Painting Laminate Wood?
Priming is crucial when painting laminate wood to ensure proper adhesion and a smooth finish. Here are the key reasons why priming is important:
- Adhesion: Primers are specifically designed to adhere to non-porous surfaces like laminate, creating a bond that allows the paint to stick effectively.
- Surface Preparation: Priming helps to fill in any imperfections on the laminate surface, providing a smoother and more uniform base for the paint.
- Color Enhancement: A good primer can prevent the laminate from showing through the paint, especially when using lighter colors, ensuring that the final coat appears vibrant and true to color.
- Durability: Priming can enhance the longevity of the paint job by adding an extra layer of protection against chipping, peeling, and fading.
- Sealing: Primers can seal the laminate surface, reducing the risk of moisture damage and ensuring that the paint adheres well over time.
What Finishing Techniques Can Enhance the Look of Painted Laminate Wood?
Several finishing techniques can significantly enhance the appearance of painted laminate wood:
- Topcoat: Applying a clear topcoat can add a protective layer over the paint, increasing durability and enhancing the sheen. This technique helps to prevent chipping and scratching, while also giving the surface a polished look that can range from matte to glossy, depending on the product used.
- Distressing: This technique involves intentionally creating a weathered or aged look on the painted laminate. By lightly sanding edges or using specific tools to chip away some of the paint, you can achieve a unique character that showcases the underlying material and adds depth to the finish.
- Glazing: A glaze can be applied over the paint to create depth and complexity in color. This semi-transparent coating can highlight details and add dimension, allowing for a more custom appearance that can mimic traditional wood finishes.
- Stenciling: Adding stencils can introduce patterns or designs, making the painted laminate wood more visually interesting. This method allows for personalization, enabling you to incorporate motifs that match your decor style, and can be easily adapted for various projects.
- Wax Finish: Applying a wax finish can provide a soft sheen and a smooth feel, enhancing the tactile quality of the painted surface. This technique also offers additional protection while allowing the paint color to shine through, giving a subtle warmth to the overall appearance.
- Decoupage: Using decoupage techniques to layer decorative paper or fabric onto the painted surface can create a striking visual effect. This method not only adds texture and personality but also allows for creative expression by incorporating various patterns and colors to suit your design theme.
What Common Mistakes Should You Avoid When Painting Laminate Wood?
When painting laminate wood, there are several common mistakes you should avoid for the best results.
- Skipping Surface Preparation: Properly preparing the surface is crucial for paint adhesion. This involves cleaning the laminate to remove any dirt or grease and lightly sanding it to create a texture that helps the paint stick better.
- Using the Wrong Type of Paint: Not all paints adhere well to laminate surfaces. The best paint for laminate wood typically includes acrylic or chalk paint, as these provide better adhesion and durability compared to traditional oil-based paints.
- Neglecting Primer: Failing to apply a primer can lead to peeling and chipping of the paint over time. A high-quality primer specifically designed for laminate surfaces will create a better bond and improve the longevity of the paint job.
- Rushing the Drying Process: Impatience can lead to applying additional coats before the paint is fully dry, resulting in smudges and uneven texture. Always allow adequate drying time as recommended on the paint can to ensure a smooth finish.
- Using the Wrong Application Tools: Using brushes or rollers that are not suited for smooth surfaces can leave brush strokes or bubbles. Instead, opt for foam rollers or high-density brushes that are designed to provide a smooth application on laminate.
- Ignoring Environmental Conditions: Painting in unsuitable conditions, such as high humidity or low temperatures, can affect the paint’s curing process. It’s essential to paint in a well-ventilated area at a temperature recommended by the paint manufacturer for optimal results.
- Overlooking Protective Coatings: Once the paint is dry, failing to apply a protective topcoat can leave the surface vulnerable to scratches and wear. A clear topcoat will not only enhance the color but also add a layer of protection against daily use.
How Can You Fix Mistakes in Painted Laminate Wood?
Fixing mistakes in painted laminate wood requires specific techniques to achieve a smooth finish and restore the surface effectively.
- Sand the Mistake: Start by lightly sanding the area where the mistake occurred using fine-grit sandpaper. This process helps to smooth out imperfections and prepares the surface for touch-up paint.
- Clean the Surface: After sanding, it’s crucial to clean the surface thoroughly with a damp cloth to remove any dust or debris. This ensures that the new paint adheres well and that the finish looks even.
- Use the Right Paint: Selecting the best paint for laminate wood is essential; choose a high-quality, durable paint that is specifically designed for laminate surfaces. This will help in achieving a lasting finish that resists chipping and peeling.
- Apply Touch-Up Paint: After the surface is clean and dry, apply a thin layer of the selected paint using a small brush or foam applicator. Be sure to feather the edges to blend the new paint seamlessly with the surrounding area.
- Allow to Cure: Once the touch-up paint is applied, allow it to cure fully as per the manufacturer’s instructions. This step is important to ensure that the paint sets properly and provides a durable finish.