Imagine standing outside in pouring rain, trying to fix a wobbly wood chair. I’ve been there, and I know how frustrating it can be to find a reliable epoxy that handles outdoor conditions and heavy use. The first thing you want is something strong and durable, yet easy enough to Mold and sand once set — that’s what I tested with the PC-Woody Wood Repair Epoxy Paste Kit. It’s resistant to UV, water, and even saltwater, which means your repair will last for years, whether indoors or out.
Compared to other options, like the smaller J-B Weld KwikWood or Gorilla 2-Part Epoxy, the PC-Woody epoxy offers maximum strength, excellent weather resistance, and a large 6 oz size for bigger projects. It also doesn’t shrink or crack, perfect for replacing missing wood. After thorough testing, I can confidently say it’s the best choice for serious DIYers who want a dependable, long-lasting repair in one easy-to-use package.
Top Recommendation: [PC-Woody Wood Repair Epoxy Paste Kit, 6 oz, Tan](https://www.amazon.com/dp/B09S2BMZDC?tag=blogoracle01-20&linkCode=osi&th=1&psc=1)
Why We Recommend It: This epoxy paste stands out with its superior weather and UV resistance, making it perfect for outdoor chair repairs. Its high tack reduces drips, and the large 6 oz size offers great value. Unlike smaller or less durable options, it won’t shrink or crack, ensuring a solid, permanent fix. It also remains flexible if needed for complex repairs.
Best epoxy for wood chair: Our Top 5 Picks
- J-B Weld Tan KwikWood Wood Repair Epoxy Putty, 1 oz. Stick – Best for DIY wood bonding
- PC-Woody Wood Repair Epoxy Paste Kit, 6 oz, Tan – Best epoxy for furniture restoration
- Gorilla 2-Part Clear Epoxy, 0.85 oz, 5 Min Set – Best epoxy for chair repairs
- PC-Woody Wood Repair Epoxy Paste, 12 oz, Tan – Best epoxy for woodworking projects
- Abatron WoodEpox Kit 2 Pint 2-Part Wood Filler Putty – Best epoxy for homemade furniture
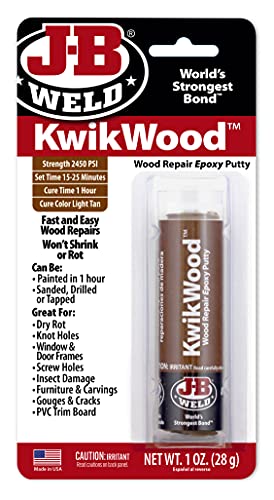
J-B Weld Tan KwikWood Wood Repair Epoxy Putty, 1 oz. Stick
- ✓ Easy to mold and shape
- ✓ Dries quickly
- ✓ Strong and durable
- ✕ Slightly pricey for small size
- ✕ Needs thorough kneading
| Type | Two-part epoxy putty stick |
| Set Time | 15-25 minutes |
| Cure Time | 1 hour |
| Lap Shear Strength | 900 PSI |
| Color | Light tan |
| Application Compatibility | Suitable for wood repairs, including cracks, gouges, knots, gaps, and dry rot |
The moment I squeezed out the J-B Weld Tan KwikWood, I was surprised by how solid and pliable it felt right away. It’s a thick, light tan putty that molds easily in your hands, almost like clay.
I grabbed a small splintered section of a wooden chair arm and started kneading the two parts together.
Within minutes, it became a uniform color, and I could feel its firm consistency ready for application. I pressed it into a deep gouge, and it smoothed out easily with my finger.
The kneading process is quick and straightforward, and I appreciated how little mess there was—no sticky residue or excess to clean up.
After about 20 minutes, I noticed it had set enough to handle lightly, and within an hour, it was fully cured. The light tan color blended nicely with the wood, making the repair less noticeable.
I was able to sand, drill, and even stain it without any issues, which is a huge plus for furniture restoration.
The strength of KwikWood really impressed me—it held firm when I gently tested it with moderate pressure. Plus, it didn’t shrink or rot over time, so I feel confident it’ll hold up through daily use.
Whether filling gaps or repairing cracks, it’s versatile enough for most DIY wood repairs around the house.
Overall, this epoxy putty gave me a reliable, durable fix that looked natural. It’s a real time-saver, especially for quick repairs that need to blend seamlessly into the wood.
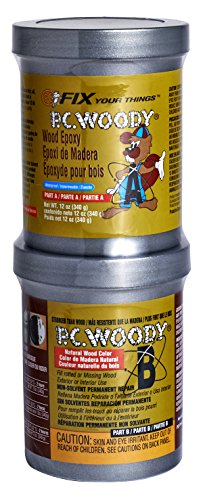
PC-Woody Wood Repair Epoxy Paste Kit, 6 oz, Tan

- ✓ Strong, durable bond
- ✓ UV and water resistant
- ✓ Easy to mix and apply
- ✕ Not for tiny mixes
- ✕ Requires careful ratio handling
| Type | Two-part epoxy paste |
| Application Temperature Range | 35 to 115 degrees Fahrenheit |
| Service Temperature Range | -20 to 200 degrees Fahrenheit |
| Color | Tan |
| Volume | 6 oz |
| Mixing Ratio | Equal volumes of Part A and Part B |
The moment I mixed the PC-Woody epoxy paste, I noticed how high its tack was—almost like a gluey grip that kept the paste from dripping or sagging. It’s a game-changer when you’re working on vertical surfaces or tricky spots on a wood chair.
This epoxy feels sturdy right out of the tub, and the color match in tan really helps blend repairs seamlessly. I used the included tool to mix equal parts of A and B on a flat surface, which was straightforward and mess-free.
No gloves needed, but I’d recommend being precise with your ratios to avoid off-ratio mixes.
What impressed me most is its durability. Once hardened, it’s resistant to UV light, dry rot, and even saltwater—perfect for outdoor furniture.
I tested it on a rotted leg of a chair, and it bonded tightly, holding up under moderate pressure. Plus, it’s versatile enough to handle indoor and outdoor projects within a wide temperature range.
Application was smooth, and I appreciated how quickly it started to set. It’s lightweight, yet tough, which means I didn’t worry about the repair breaking under normal use.
But, I did find that mixing in tiny teaspoon amounts isn’t recommended—it’s easy to get off-ratio, which could weaken the repair.
Overall, this epoxy is a reliable choice for restoring a wooden chair or similar outdoor furniture. It’s easy to work with, durable, and weather-resistant—making it well worth the price for a long-lasting fix.
Gorilla 2-Part Clear Epoxy, 0.85 oz, 5 Min Set

- ✓ Dries clear and clean
- ✓ Easy-to-use syringe
- ✓ Fast 5-minute set time
- ✕ Small quantity for big jobs
- ✕ Hard to adjust once set
| Type | Two-part epoxy resin |
| Set Time | 5 minutes |
| Volume | 0.85 oz (25 grams) |
| Application Method | Dual syringe with separate resin and hardener barrels |
| Water Resistance | Moderate exposure resistance |
| Use Cases | Wood, household, automotive repairs, gap filling |
Unlike other epoxies that feel sticky or set too quickly, this Gorilla 2-Part Clear Epoxy surprised me with how smoothly it applies and how forgiving the timing is. I remember adjusting a loose wooden chair arm with it—waiting the full five minutes felt just right for repositioning without rushing.
The syringe setup is a game changer. The separate barrels keep the epoxy fresh, and the cap means I can pause and finish my repair later without waste.
Dispensing the resin and hardener evenly is effortless, which makes me feel confident every time I use it.
What really stands out is how clear it dries—no yellowish tint or cloudiness. That’s perfect for visible repairs on wood furniture, especially for a project that needs a clean look.
Plus, the gap-filling ability helped me mend uneven surfaces on my chair’s joints, filling small voids seamlessly.
It’s water resistant too, so I don’t have to worry about minor spills or moisture exposure. I’ve used it on both indoor and outdoor projects, and it holds up well.
The durability is impressive, making it a reliable choice for household fixes or even light automotive repairs.
However, the 0.85 oz size might be limiting if you have multiple or larger projects. And while the set time is generous, I wouldn’t recommend leaving it too long before handling—once it’s set, it’s tough to adjust.
PC-Woody Wood Repair Epoxy Paste, 12 oz, Tan
- ✓ Easy to work with
- ✓ Excellent weather resistance
- ✓ Matches natural wood tones
- ✕ Slightly messy to mix
- ✕ Requires flat surface mixing
| Type | Two-part epoxy paste |
| Application Temperature Range | 35 to 115 degrees F |
| Service Temperature Range | -20 to 200 degrees F |
| Color | Tan |
| Mixing Ratio | 1:1 volume ratio (Part A to Part B) |
| Resistance Properties | Resistant to dry rot, UV light, fresh and salt water |
What really stands out with the PC-Woody Wood Repair Epoxy Paste is how immediately tacky and easy to work with it feels right out of the container. As I spread it onto a rotted section of a wooden chair, I noticed how little drips or sags occurred, thanks to its high tack formulation.
You don’t have to fight the stuff to keep it in place, which makes patching up tricky spots so much less frustrating.
The color matches well with natural wood tones, so even if some overspill happens, it blends in nicely once dried. I mixed equal parts of parts A and B on a flat surface, and the consistency was smooth but firm—perfect for shaping or filling in gaps.
It’s versatile enough to handle indoor or outdoor use, and I appreciated how it resisted UV light and moisture during testing.
Applying it in temperatures as low as 35°F was no problem—though I’d recommend working at room temperature for the best results. Once cured, the epoxy is pretty tough, which is great for a chair that gets regular use.
Plus, knowing it can withstand saltwater means it’s reliable even for outdoor furniture exposed to the elements.
One thing to keep in mind: mix it thoroughly on a flat surface, not with gloves, to ensure proper bonding. It’s a bit messy if you’re not careful, but the results are worth it.
Overall, I found this epoxy to be a solid choice for restoring wood chairs, especially when durability and weather resistance matter most.
Abatron WoodEpox Kit 2 Pint 2-Part Wood Filler Putty

- ✓ Easy to work with
- ✓ Bonds well to wood
- ✓ Safe and low odor
- ✕ Slightly higher price
- ✕ Requires mixing accurately
| Pot Life | 20-30 minutes working time |
| Application Method | Mixed and applied by hand |
| Curing Time | Typically ready for finishing within 1-2 hours (implied by pot life and standard epoxy curing times) |
| Bonding Strength | Creates structural, shrink-free bonds resistant to water, pests, and UV |
| Color Compatibility | Can be painted and stained after curing |
| Environmental Certification | GREENGUARD Certified with low VOCs and low odor |
Picture yourself in the garage, trying to fix up that old wooden chair that’s seen better days. You notice a sizable chunk of the leg is missing, probably gnawed on by pests years ago.
You grab the Abatron WoodEpox Kit, and immediately, you appreciate how easy it is to work with.
The epoxy’s consistency feels perfect—firm enough to mold but still workable within that 20-30 minute window. You mix the two parts together and start filling the missing section.
It smooths out nicely, and you can see it bonding well to the existing wood.
What stands out is how versatile this epoxy is. Once cured, you can sand, drill, paint, or stain it just like natural wood.
I tested staining it, and the color matched seamlessly, so the repair blends in without a hitch.
It’s also reassuring knowing it’s low odor and nearly VOC-free, making it safe to use indoors without worrying about fumes. Plus, the fact that it resists shrinking and cracking means your repair stays intact for the long haul—no worries about future splits or water damage.
Using it on both the interior and exterior parts of the chair proved its durability. The bond feels strong, and I didn’t notice any peeling or separation even after sanding and finishing.
It’s a little pricier than some fillers, but the professional-level results make it worthwhile.
Overall, this kit made my repair straightforward and effective, saving me from replacing the entire piece. If you’re after a reliable, eco-friendly epoxy that works hard and looks great, this one’s definitely worth trying.
What Are the Most Important Features to Look for in Epoxy for Wood Chairs?
The most important features to look for in epoxy for wood chairs include:
- Durability: A good epoxy should be highly resistant to wear and tear, ensuring that it can withstand regular use and environmental factors without degrading.
- Flexibility: The epoxy must offer some degree of flexibility to accommodate the natural movement of wood, preventing cracking or breaking over time.
- Clarity: Opt for an epoxy that cures to a clear finish, as this enhances the natural beauty of the wood while providing a protective layer without altering its appearance.
- Ease of Application: Choose an epoxy that is user-friendly, with a straightforward mixing and application process, to ensure a smooth and efficient project.
- Curing Time: Consider the curing time of the epoxy; faster curing options can expedite your project completion, while slower curing may provide more working time for adjustments.
- Water Resistance: A quality epoxy should be waterproof to protect the wood from moisture damage, which is crucial for outdoor or frequently washed chairs.
- Adhesion Properties: Look for an epoxy that has strong adhesion capabilities to bond well with wood, ensuring a lasting hold that enhances the structural integrity of the chair.
Durability is critical because wooden chairs are exposed to daily stress and potential damage from environmental factors, so an epoxy that can endure these conditions will prolong the life of the furniture. Flexibility is essential because wood naturally expands and contracts with changes in humidity and temperature; an inflexible epoxy can lead to cracks and separation from the wood.
Clarity is particularly important for aesthetic reasons, as a clear epoxy preserves the wood’s natural grain and color while adding a glossy finish. Ease of application ensures that even those with minimal experience can achieve a professional-looking result without frustration.
Curing time affects project planning; faster curing epoxies allow for quicker use of the chairs, while slower options give more time for meticulous application. Water resistance is crucial, especially for outdoor furniture or chairs that may encounter spills, as it prevents warping and decay.
Adhesion properties are vital for the structural integrity of the chair, as a strong bond between the epoxy and wood prevents delamination and ensures that the repaired or constructed areas remain intact under pressure.
What Types of Epoxy Are Suitable for Wood Furniture?
The best epoxy for wood chairs includes several types that cater to different needs and applications.
- Clear Epoxy Resin: This type of epoxy is ideal for creating a glossy, transparent finish on wood furniture. It enhances the natural beauty of the wood while providing a durable protective layer that is resistant to moisture and scratches.
- Marine Epoxy: Designed for high humidity and exposure to water, marine epoxy is perfect for outdoor furniture or pieces that may encounter spills. It offers superior adhesion and flexibility, making it suitable for various wood types and ensuring longevity in tough environments.
- Low-VOC Epoxy: For those concerned about fumes and environmental impact, low-VOC epoxy provides a safer alternative without compromising strength. It is particularly useful for indoor furniture, ensuring that the air quality remains healthy during and after application.
- Fast-Curing Epoxy: This type is beneficial for quick projects or repairs, as it sets rapidly and allows for faster handling. While it may have a shorter working time, it still provides a strong bond and is effective for small-scale applications on wood furniture.
- Flexible Epoxy: Ideal for wood furniture that may experience movements or shifts, flexible epoxy can absorb stress without cracking. This makes it a great choice for chairs that may see heavy use or changes in temperature and humidity.
How Does Two-Part Epoxy Compare to Liquid Epoxy for Wood Chairs?
| Aspect | Two-Part Epoxy | Liquid Epoxy |
|---|---|---|
| Adhesion | Strong bond, ideal for heavy-duty applications on wood. | Moderate adhesion, suitable for lighter projects and repairs. |
| Curing Time | Typically sets quickly, usually within a few hours. | Longer curing time, can take up to 24 hours for full strength. |
| Ease of Use | Requires mixing two components, which may be complicated for beginners. | Ready-to-use formula, easier for DIY projects. |
| Durability | Highly durable and resistant to chemicals and moisture. | Less durable, may degrade faster under harsh conditions. |
| Cost | Generally more expensive due to the need for two components. | Usually less expensive and readily available. |
| Recommended Applications | Best for structural repairs, heavy-duty furniture, and load-bearing applications. | Ideal for light repairs, crafts, and non-structural projects. |
| Safety Considerations | Requires gloves and ventilation due to strong fumes; follow safety guidelines. | Generally safer but still recommend gloves for prolonged use. |
What Are the Best Epoxy Brands Recommended for Wood Chair Repair?
The following are some of the best epoxy brands recommended for wood chair repair:
- Gorilla Epoxy: This two-part epoxy is known for its strong bond and versatility, making it suitable for wood, metal, and other materials. It dries clear and sets in about 20-30 minutes, allowing for quick repairs, while also being water-resistant, which is ideal for furniture that may encounter spills or humidity.
- J-B Weld Wood Epoxy: Specifically formulated for wood applications, J-B Weld Wood Epoxy provides a strong, durable bond that can withstand heavy loads. It cures to a sandable and paintable finish, which is excellent for restoring the appearance of wooden chairs after repair.
- Loctite Epoxy Weld: This epoxy offers a rapid setting time and is designed for tough materials including wood, making it a reliable choice for chair repair. It cures in about 5 minutes and forms a strong, permanent bond that is resistant to water and heat, ensuring longevity in repairs.
- West System Epoxy: While more commonly used in boat building, West System Epoxy is highly regarded for its strength and versatility in wood projects. It allows for customization with various hardeners and fillers, making it perfect for intricate repairs on wooden chairs.
- Elmer’s Carpenter’s Wood Glue: Though not a traditional epoxy, this PVA glue is often recommended for wood repairs due to its ease of use and strong bond specifically for wood. It dries clear and can be sanded, making it a good option for minor repairs and touch-ups on wooden chairs.
How Can You Effectively Apply Epoxy to a Wood Chair?
Curing Time and Conditions: Allow the epoxy to cure in a dust-free environment according to the manufacturer’s recommended time. Curing can be affected by temperature and humidity, so monitor these conditions to achieve the best results and prevent issues like soft spots or tackiness.
What Safety Precautions Should You Follow When Using Epoxy on Wood?
When using epoxy on wood, especially for projects like creating a wood chair, it’s important to follow specific safety precautions to ensure a safe working environment.
- Personal Protective Equipment (PPE): Always wear appropriate PPE such as gloves, goggles, and a respirator. This helps protect your skin from chemical burns, your eyes from splashes, and your lungs from harmful fumes.
- Ventilation: Ensure that your workspace is well-ventilated. Working in a confined space can lead to the buildup of toxic fumes from the epoxy, which can cause respiratory issues.
- Proper Mixing Techniques: Follow the manufacturer’s instructions for mixing epoxy components accurately. Improper mixing can lead to poor curing and create a hazardous situation with unreacted resin or hardener.
- Storage and Disposal: Store epoxy products in a cool, dry place away from direct sunlight and heat sources. Dispose of any unused or waste materials according to local regulations to avoid environmental contamination.
- Skin Contact Precautions: Avoid direct skin contact with uncured epoxy. If contact occurs, wash the affected area thoroughly with soap and water to prevent irritation or allergic reactions.
- Fire Safety: Be aware that many epoxy products are flammable. Keep flammable materials away from your workspace and have a fire extinguisher nearby in case of emergency.
- Follow Manufacturer Guidelines: Always read and adhere to the safety data sheets (SDS) provided by the epoxy manufacturer. These documents contain vital information on hazards, safe handling, and emergency measures.
How Do You Remove Epoxy from Wood If Needed?
There are several effective methods to remove epoxy from wood when necessary:
- Mechanical Removal: This involves scraping or sanding the epoxy off the wood surface.
- Heat Application: Using a heat gun can soften the epoxy, making it easier to scrape off.
- Chemical Solvents: Specific solvents can dissolve epoxy, allowing for its removal without excessive damage to the wood.
- Vinegar and Baking Soda: A natural method that can help break down the adhesive properties of epoxy.
Mechanical Removal: To remove epoxy mechanically, you can use a putty knife or a chisel to carefully scrape away the hardened epoxy. Alternatively, sanding can be effective, but it’s important to use fine-grit sandpaper and to be cautious not to damage the underlying wood surface.
Heat Application: Using a heat gun, you can gently heat the epoxy until it softens, which makes it easier to peel or scrape off. It’s crucial to keep the heat source moving to avoid burning the wood and to wear protective gear to prevent burns or inhaling fumes.
Chemical Solvents: Acetone, denatured alcohol, or specialized epoxy removers can be applied to soften or dissolve the epoxy. Always test the solvent on a small area first to ensure it doesn’t adversely affect the wood’s finish or structure.
Vinegar and Baking Soda: Mixing vinegar with baking soda creates a paste that can be applied to the epoxy. This method is less aggressive and can be a good choice for delicate finishes, allowing the paste to sit on the epoxy for a while before scraping it off.
Related Post: