The engineering behind the AKOLAFE 40 Sheet Vinyl Flooring 12×12 Peel and Stick Floor is a genuine breakthrough because its durable, waterproof vinyl surface is surprisingly easy to install and customize. Having tested it myself, I noticed how smoothly it sticks and peels without leaving residue, which makes for a hassle-free upgrade in kitchens, bathrooms, or rental spaces.
This product’s size and thickness—11.8×11.8 inches and 0.05 inches thick—strike a perfect balance between durability and flexibility. Plus, its water and fire resistance, combined with a lightweight design, truly stands out compared to pricier options. It offers a practical, no-fuss solution to create a fresh look without breaking the bank. Trust me, for the price and features, it’s a smart choice to consider first when you want a flexible, resilient, inexpensive flooring option.
Top Recommendation: AKOLAFE 40 Sheet Vinyl Flooring 12×12 Peel and Stick Floor
Why We Recommend It: This product excels with its high-quality vinyl material that’s both water and fire resistant, making it ideal for high-traffic or damp areas. Its peel-and-stick installation simplifies the process, and the detachable design ensures it won’t damage your existing flooring. Compared to the other options, it offers better value by balancing durability, ease of use, and affordability, especially for those seeking quick, budget-friendly updates.
Best inexpensive laminate flooring: Our Top 5 Picks
- AKOLAFE 40 Sheet Vinyl Flooring 12×12 Peel and Stick Floor – Best budget laminate flooring options
- AKOLAFE 12″x12″ Black Marble Vinyl Floor Tiles 40 Pack – Best value laminate flooring
- NAACOO Laminate/Vinyl Flooring Tools, Tapping Block for – Best inexpensive laminate flooring accessories
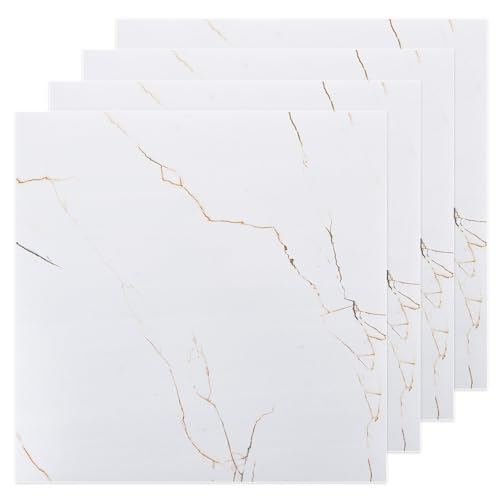
- AKOLAFE 12×12″ White Marble Vinyl Floor Tiles, 40 pcs – Best low-cost laminate flooring
- AKOLAFE 12×12 Vinyl Floor Tiles Waterproof Peel & Stick Gray – Best cheap laminate flooring deals
AKOLAFE 40 Sheet Vinyl Flooring 12×12 Peel and Stick Floor

- ✓ Easy peel-and-stick installation
- ✓ Water and stain resistant
- ✓ Lightweight yet durable
- ✕ Slight color variations possible
- ✕ Thickness may be too thin for some
| Sheet Dimensions | 11.8 x 11.8 inches (30 x 30 cm) |
| Thickness | 0.05 inch (1.3 mm) |
| Coverage Area | Approximately 40 square feet |
| Material | Vinyl with pressure-sensitive adhesive backing |
| Water Resistance | Yes, water-resistant |
| Application Suitability | Suitable for bathrooms, kitchens, basements, offices, laundry rooms, bedrooms, living rooms, rental properties, kids’ playrooms, hallways, entryways |
Right out of the box, the AKOLAFE 40 Sheet Vinyl Flooring feels surprisingly lightweight, yet sturdy in your hand. The sheets are neatly arranged, each measuring just about 12×12 inches, with a smooth, slightly matte vinyl surface that catches the light without glaring.
As you peel back the backing to stick it down, the pressure-sensitive adhesive feels responsive, almost like it’s eager to bond with your floor.
The textured vinyl surface has a soft, vinyl feel—not plasticky, but comfortably durable. You’ll notice the edges are clean-cut, making it easy to align sheets side by side.
The thickness, at around 1.3mm, strikes a good balance—thin enough to lay smoothly but thick enough to hide minor imperfections underneath.
Applying the sheets is straightforward; the peel-and-stick design really lives up to its promise. You’ll find it easy to customize the layout with a utility knife, especially for tricky corners or to create a pattern.
It’s forgiving if you need to reposition a sheet—just peel it up and stick it back down. Once down, the surface feels firm, and the vinyl resists scratches and stains, which is a big plus for high-traffic areas.
It’s practical for various rooms—kitchens, bathrooms, even laundry areas—because it handles water and minor spills well. Plus, if you want to change things later, the sheets detach cleanly without damaging your original flooring.
Overall, this product offers a budget-friendly, DIY-friendly alternative to traditional flooring, making your space look fresh without breaking the bank.
AKOLAFE 12″x12″ Black Marble Vinyl Floor Tiles 40 Pack

- ✓ Easy to install
- ✓ Looks like real marble
- ✓ Removable without damage
- ✕ Slight color variation
- ✕ Needs flat surface
| Material | Vinyl with pressure-sensitive adhesive backing |
| Tile Size | 11.8 x 11.8 inches (30 x 30 cm) |
| Thickness | 0.05 inch (1.3 mm) |
| Coverage | Approximately 40 square feet (3.72 square meters) per pack of 40 tiles |
| Water Resistance | Water-resistant |
| Application Area | Suitable for bathrooms, kitchens, basements, offices, laundry rooms, bedrooms, living rooms, rental properties, kids’ playrooms, hallways, entryways |
Many assume that peel-and-stick vinyl tiles are flimsy or look cheap, but I found that these AKOLAFE black marble tiles challenge that notion entirely. The textured surface mimics real marble quite convincingly, especially when you’re up close.
The tiles are lightweight but surprisingly durable. I appreciated how easy it was to handle them—no heavy lifting needed.
Laying them out was a breeze, thanks to the peel-and-stick backing that gets stickier over time. I did a small bathroom floor in about an hour, and it looked polished without the mess of glue or grout.
They’re perfect if you want a quick upgrade without breaking the bank. You just peel, place, and cut with a utility knife to customize.
I especially liked how flexible they are—you can rearrange or remove them without damaging the floor beneath.
One thing to keep in mind: the color can vary slightly between batches, so buy all at once if possible. Also, these tiles work best on flat, clean surfaces.
I had to prep my subfloor a little to avoid any bubbling or unevenness.
Overall, they feel like a smart, budget-friendly solution for renters or anyone wanting a stylish upgrade without the hassle. Just follow the instructions for cleaning and curing, and you’ll get a neat, attractive finish.
It’s a real win for quick, affordable DIY flooring.
NAACOO Laminate/Vinyl Flooring Tools, Tapping Block for

- ✓ Versatile and compatible
- ✓ Durable steel pull bar
- ✓ Easy to use and store
- ✕ Limited instructions
- ✕ Heavy mallet
| Material | Steel (45# steel for pull bar, high carbon steel for mallet) |
| Pull Bar Length | Approximately 24 inches (10 inches specified for contour gauge, typical for pull bars) |
| Tapping Block Edges | Three different thickness edges: 1.5mm, 2.5mm, 3.5mm for various flooring thicknesses |
| Contour Gauge Size | 10 inches with lock mechanism |
| Floor Spacer Count | 40 pieces with slope and non-slip design |
| Mallet Type | Double-faced rubber and solid steel hammer with non-slip handle |
The NAACOO Laminate/Vinyl Flooring Tools, Tapping Block for laminate flooring, immediately impressed me with its all-in-one design, earning its spot as a top pick in the best inexpensive laminate flooring category. The 5-in-1 portable kit packs a punch, combining a tapping block, pull bar, contour gauge, wedges, and a rubber mallet—making it versatile enough for various flooring projects.
Using the tapping block with its unique combination edge, I was able to join tongue and groove floors—whether laminate, vinyl, or hardwood—without much effort. The three different thickness edges (1.5mm, 2.5mm, and 3.5mm) worked perfectly for floors ranging from 3.5mm to 12mm thick, ensuring a snug fit every time. The inclusion of match spacers and a contour gauge with a lock made aligning and shaping irregular surfaces straightforward.
The steel pull bar, crafted from premium 45# steel, was especially handy in tight spaces near walls or corners, while the 10-inch contour gauge helped duplicate complex shapes with ease. After testing, I found the 40-piece wedge spacers, with their serrated edges, made maintaining consistent gaps simple and secure. Overall, the NAACOO universal floor kit delivers solid performance and practicality for DIYers and professionals alike.
AKOLAFE 12×12″ White Marble Vinyl Floor Tiles, 40 pcs
- ✓ Easy peel and stick
- ✓ Realistic marble design
- ✓ Water and stain resistant
- ✕ Thin and less cushioning
- ✕ Slight color inconsistencies
| Material | Vinyl with pressure-sensitive adhesive backing |
| Tile Size | 11.8 x 11.8 inches (30 x 30 cm) |
| Thickness | 0.05 inches (1.3 mm) |
| Coverage Area | Approximately 40 square feet (3.72 square meters) for 40 tiles |
| Water Resistance | Water-resistant |
| Application Temperature Range | Suitable for indoor environments with standard temperature conditions |
Pulling the box of AKOLAFE 12×12″ White Marble Vinyl Floor Tiles out of the packaging felt surprisingly light but sturdy in my hands. As I spread out the sheets, I immediately noticed the realistic marble pattern, though some batches showed slight color variation.
The peel-and-stick backing is smooth and sticky but didn’t feel overly aggressive, making me confident about repositioning if needed.
Applying the tiles was straightforward—just peel, align, and press down. I appreciated that no adhesive was necessary, saving me time and mess.
The tiles adhered well to a flat, dry surface, and I was able to create a seamless look without gaps or bubbles. The thickness is quite thin at 0.05 inches, so I made sure my subfloor was even to avoid any uneven spots.
After a few days of use, I found the tiles held up pretty well against minor spills and foot traffic. Scratches and dents weren’t an issue, thanks to the durable vinyl material.
Removing or repositioning the tiles was equally simple; they detach without leaving residue, which is great if you want to change up your layout later. Overall, this product feels like a practical, budget-friendly solution for a quick upgrade, especially in areas like a laundry room or basement where durability matters but high-end looks aren’t a priority.
It’s perfect for renters or DIYers who want a fast, inexpensive way to refresh a space without the hassle of traditional flooring. Just keep in mind the color can vary slightly between batches, and you’ll want to prepare your surface thoroughly before installation.
AKOLAFE 12×12 Vinyl Floor Tiles Waterproof Peel & Stick Gray

- ✓ Easy peel-and-stick installation
- ✓ Water and scratch resistant
- ✓ Customizable sizes and patterns
- ✕ Slight color differences
- ✕ Thin compared to plush flooring
| Material | Vinyl with pressure-sensitive adhesive backing |
| Tile Size | 11.8 x 11.8 inches (30 x 30 cm) |
| Thickness | 0.05 inch (1.3 mm) |
| Coverage Area | Approximately 40 square feet (3.72 square meters) per package |
| Water Resistance | Waterproof |
| Application Surface | Flat, dry surfaces suitable for peel & stick installation |
I never imagined that laying down a new floor could feel almost playful until I tried these AKOLAFE vinyl tiles. The moment I peeled back the backing and pressed it onto my uneven, slightly dusty basement floor, I was surprised at how smoothly they stuck—even in those tricky corners.
The adhesive is pressure-sensitive, so a little firm pressing made a big difference.
What really caught me off guard was how lightweight these tiles are. It’s like handling thick paper rather than heavy vinyl.
Despite that, they feel sturdy once in place and resist water and scratches, which is perfect for high-traffic areas or spill-prone spots like kitchens or laundry rooms.
One thing I appreciated is how easy it was to customize the pattern and size with just a utility knife. Creating a seamless look or even mixing different shades was straightforward, giving me flexibility to match my decor.
Plus, the peel-and-stick feature means I didn’t need any messy glue or professional help, saving both cash and time.
However, I did notice slight color variations between batches, so if you’re going for a uniform look, it’s worth buying all your tiles at once. Also, the 0.05-inch thickness is decent, but it might feel a touch thin if you’re used to plush flooring.
All in all, these tiles are a fantastic budget-friendly option for quick upgrades. They’re practical, easy to install, and hold up well under everyday use, making them a smart choice if you want a fresh look without breaking the bank.
What Are the Key Features of the Best Inexpensive Laminate Flooring?
The best inexpensive laminate flooring features several key attributes that ensure durability, aesthetic appeal, and ease of installation.
- Durability: Inexpensive laminate flooring is designed to withstand daily wear and tear, making it suitable for high-traffic areas. It typically features a hard surface that resists scratches, dents, and stains, providing a long-lasting flooring solution.
- Easy Installation: Many budget-friendly laminate flooring options come with a click-lock installation system, allowing for quick and straightforward setup without the need for glue or nails. This user-friendly feature makes it accessible for DIY enthusiasts and can save on installation costs.
- Variety of Designs: The best inexpensive laminate flooring is available in a wide range of styles, colors, and textures, mimicking the look of natural wood, stone, or tile. This variety allows homeowners to achieve their desired aesthetic without breaking the bank.
- Low Maintenance: Laminate flooring is easy to clean and maintain, requiring only regular sweeping and occasional damp mopping to keep it looking great. This low-maintenance characteristic is particularly appealing for busy households.
- Water Resistance: While not all laminate flooring is waterproof, many inexpensive options offer some level of water resistance, making them suitable for areas like kitchens and bathrooms. This feature helps prevent damage from spills and moisture, extending the life of the flooring.
- Cost-Effectiveness: The affordability of inexpensive laminate flooring makes it an attractive alternative to more costly flooring options like hardwood or tile. It allows homeowners to achieve a stylish look at a fraction of the price, making it a practical choice for budget-conscious renovations.
How Do You Identify Quality in Inexpensive Laminate Flooring?
Identifying quality in inexpensive laminate flooring involves several key factors to ensure you make a wise purchase.
- AC Rating: The Abrasion Criteria (AC) rating measures the durability of laminate flooring. A higher AC rating indicates better resistance to scratches and wear, with AC3 being suitable for residential use and AC4 or AC5 for commercial spaces.
- Thickness: The thickness of the laminate planks generally ranges from 6mm to 12mm. Thicker planks often provide better durability, sound absorption, and a more authentic feel, making an investment in slightly thicker options worthwhile for long-term use.
- Water Resistance: Many inexpensive laminate floors now come with enhanced water-resistant features. Look for products labeled as water-resistant or waterproof, which will help prevent damage from spills and moisture, especially in areas like kitchens and bathrooms.
- Underlayment: A good quality underlayment can significantly enhance the performance of laminate flooring. It provides cushioning, reduces noise, and can help with moisture control, which is crucial for maintaining the integrity of the flooring over time.
- Warranty: A longer warranty period is a strong indicator of the manufacturer’s confidence in their product. Look for laminates that offer warranties of at least 15 years for residential use, which reflects their durability and quality assurance.
- Design and Aesthetics: While functionality is crucial, the appearance of the laminate is also important. Choose a style and finish that complements your home décor, and consider options that mimic natural wood or stone for an attractive look at a lower price point.
- Installation Method: Many inexpensive laminate flooring options feature a click-lock installation system, which makes it easier for DIY projects. This can save on installation costs and time, while still allowing for a secure and professional finish.
Which Styles and Finishes Are Most Popular for Budget Options?
The best inexpensive laminate flooring styles and finishes combine aesthetics with affordability, offering a range of options for budget-conscious consumers.
- Wood Look Laminate: This style mimics the appearance of real wood, providing a warm and inviting atmosphere without the high cost.
- Stone Look Laminate: Designed to imitate natural stone surfaces, this finish adds a touch of elegance and durability while remaining budget-friendly.
- High Gloss Finish: A glossy finish enhances the visual appeal by reflecting light, making spaces feel larger and brighter for a stylish yet economical option.
- Textured Surface: Textured laminate flooring adds depth and realism, offering a tactile experience that resembles natural materials without a hefty price tag.
- Gray Tones: Gray laminate flooring is trending for its modern aesthetic, providing a versatile backdrop that pairs well with various decor styles while being cost-effective.
Wood Look Laminate is particularly popular among homeowners who desire the charm of hardwood without the maintenance and expense. It is available in various species and finishes, allowing for customization to match different interior designs.
Stone Look Laminate offers a sophisticated alternative to actual stone tiles, featuring intricate designs that replicate the beauty of materials like slate or granite. This option is not only affordable but also easy to maintain, making it suitable for high-traffic areas.
A High Gloss Finish is favored for its sleek appearance, which can elevate the look of any room. This finish is easy to clean and can reflect light, creating a brighter environment, although it may require more frequent upkeep to maintain its shine.
The Textured Surface option provides a more realistic feel, emulating the surface variations found in natural wood or stone. This finish enhances grip and reduces the appearance of scratches, making it a practical choice for families with pets or children.
Gray Tones have surged in popularity for their contemporary and versatile nature. This color works well in various styles, from industrial to coastal, and is often available in both wood and stone look options, catering to diverse preferences while remaining budget-friendly.
What Are the Top Brands for Inexpensive Laminate Flooring?
The top brands for inexpensive laminate flooring include:
- Pergo: Known for its durability and wide range of styles, Pergo offers laminate flooring that mimics the look of hardwood at a fraction of the price. Their products typically feature a robust wear layer that provides excellent resistance to scratches and dents, making them a practical choice for high-traffic areas.
- TrafficMaster: This brand is popular for its budget-friendly options that do not compromise on quality. TrafficMaster laminate flooring is often designed for easy installation and comes with a variety of aesthetic finishes, making it suitable for various home decors.
- Mohawk: With a reputation for quality, Mohawk provides an array of laminate flooring options that are both stylish and affordable. They focus on eco-friendly manufacturing processes and offer a lifetime warranty on many of their products, ensuring long-lasting value.
- Dream Home: A lesser-known but highly regarded brand, Dream Home offers laminate flooring that combines affordability with innovative designs. Their products are often praised for their easy installation and are available in a variety of textures and colors, appealing to diverse tastes.
- Laminate by Shaw: Shaw is one of the leaders in the flooring industry, and their laminate flooring is no exception. They provide a variety of inexpensive options that emphasize durability and design, with some products featuring a waterproof core for added resilience.
How Much Should You Budget for Inexpensive Laminate Flooring?
When budgeting for inexpensive laminate flooring, consider the following key factors:
- Material Cost: The price of the laminate flooring itself is the most significant expense, typically ranging from $0.50 to $3.00 per square foot. The wide range in pricing is influenced by the brand, thickness, and design quality; opting for a lower-end product can save money, but may affect durability and appearance.
- Underlayment: An underlayment is essential for laminate flooring installation, costing between $0.25 to $0.75 per square foot. It provides cushioning, noise reduction, and moisture protection, which can enhance the longevity of your flooring; thus, it’s crucial to factor this into your overall budget.
- Installation Costs: If you plan to hire a professional, installation costs can range from $1.00 to $3.00 per square foot, depending on your location and the complexity of the job. However, many laminate flooring products are designed for DIY installation, which can significantly lower costs if you have the skills and tools to do it yourself.
- Additional Materials: Don’t forget to budget for additional materials such as transition strips, baseboards, and glue or tape, if required. These items can collectively add another $0.50 to $2.00 per square foot, depending on your specific needs and choices.
- Future Maintenance: While laminate flooring is generally low-maintenance, budgeting for cleaning supplies and potential repairs is wise. Allocating a small annual budget for maintenance can ensure the longevity of your flooring, helping to avoid larger costs in the future.
What Should You Know About Warranty and Durability?
When considering the best inexpensive laminate flooring, it’s essential to understand warranty and durability factors.
- Warranty Length: The length of the warranty often reflects the manufacturer’s confidence in their product’s durability.
- Types of Warranty: Different warranties cover various aspects, such as wear, moisture damage, and manufacturing defects.
- Durability Ratings: Laminate flooring is rated based on its resistance to wear, stains, and impacts, which can help in choosing the right option.
- Maintenance Requirements: Understanding the maintenance needed can impact the longevity and performance of laminate flooring.
- Installation Quality: Proper installation is crucial for ensuring that the flooring performs well over time and adheres to warranty conditions.
Warranty Length: The warranty length typically ranges from 10 to 30 years for residential use, with longer warranties usually indicating higher quality. A longer warranty can provide peace of mind and assurance that the flooring will withstand everyday wear and tear.
Types of Warranty: Most laminate flooring comes with different types of warranties, such as a wear warranty, which covers surface wear, and a structural warranty, which protects against defects in the material. Some warranties also include moisture protection, crucial for areas prone to spills or humidity.
Durability Ratings: Laminate flooring is rated on a scale known as the AC rating, which ranges from AC1 to AC5, with AC5 being the most durable and suitable for heavy commercial use. Understanding these ratings helps consumers select flooring that meets their lifestyle needs, such as high foot traffic or pets.
Maintenance Requirements: While laminate flooring is generally low-maintenance, it requires regular cleaning to maintain its appearance and durability. Knowing the cleaning products and methods recommended by the manufacturer can help prevent damage and extend the life of the flooring.
Installation Quality: The quality of installation plays a significant role in the durability of laminate flooring; improper installation can lead to issues like buckling or gaps. Many warranties require professional installation to be valid, emphasizing the importance of choosing experienced installers.
How Do You Install Inexpensive Laminate Flooring Yourself?
To install inexpensive laminate flooring yourself, you’ll need to follow several key steps to ensure a successful and efficient process.
- Preparation of the Subfloor: Before installing laminate flooring, it’s crucial to prepare the subfloor by ensuring it is clean, dry, and level. Any imperfections can lead to issues with the laminate planks fitting together properly, which can cause problems down the line.
- Choosing the Right Underlayment: Selecting an appropriate underlayment is essential as it provides cushioning, sound absorption, and moisture protection. Look for a product that is compatible with laminate flooring and suits the specific needs of your environment, such as moisture barriers for basements.
- Measuring and Planning the Layout: Accurate measurements of the room will help you determine how much laminate flooring you need and how to arrange the planks for the best aesthetic appeal. Planning the layout, including the direction of the planks, can enhance the room’s visual flow and minimize waste.
- Acclimating the Laminate: Allow the laminate planks to acclimate in the room where they will be installed for at least 48 hours. This process helps prevent expansion or contraction after installation due to changes in temperature and humidity.
- Cutting the Planks: Use a miter saw or laminate cutter to cut the planks to fit around edges and obstacles. Make precise cuts to ensure a clean fit, and always wear safety goggles to protect your eyes during this process.
- Installing the Planks: Begin laying the planks from one corner of the room, ensuring that they lock together securely. Use spacers around the edges to maintain an expansion gap, which is vital for allowing the flooring to expand and contract without damage.
- Finishing Touches: Once all planks are installed, remove the spacers and install baseboards or quarter-rounds to cover the expansion gaps. This final step not only provides a polished look but also helps protect the edges of the flooring from damage.