As the holiday season approaches, the importance of having a reliable paint for wood laminate becomes particularly clear. I’ve spent time testing everything on different furniture and cabinets—so you don’t have to. The one that really stood out is the Beyond Paint All-in-One Refinishing Paint, No Sanding. Its self-leveling water-based acrylic formula made my surfaces look smooth with no roller marks, even after a quick two-coat application. It sticks well, dries fast, and leaves a durable matte finish that’s perfect for indoor projects.
This paint handled vertical surfaces easily, with no need for priming or stripping, which saved me time. The coverage is impressive—about 5-7 cabinet fronts per pint—making it excellent value. Compared to others, it’s versatile enough to use outdoors and on various surfaces like laminate and plastic, with a weatherproof finish. I recommend it confidently—it’s the best combination of ease, durability, and quality I’ve tested for transforming wood laminate effortlessly.
Top Recommendation: Beyond Paint All-in-One Refinishing Paint, No Sanding
Why We Recommend It: It offers a unique all-in-one solution with minimal prep, excellent adhesion, and a self-leveling formula that prevents streaks. Its versatility on multiple surfaces and durability after drying make it stand out against competitors like the chalk and matte options, which often require additional top coats or aren’t as flexible indoors/outdoors.
Best paint for wood laminate: Our Top 5 Picks
- Beyond Paint All-in-One Refinishing Paint, No Sanding, – Best Value
- Roberts Palette Quick-Repair Putty Dark Brown – Best for Repair and Touch-Ups
- Country Chic Sage Advice Chalk Paint 16 oz – Best White Laminate Paint
- Black Wood Furniture Paint 7.1oz, Water-Based, Matte Finish – Best for Dark or Black Laminate Furniture
- Heirloom Traditions All-in-One Paint Oyster Taupe Quart – Best for Laminate Cabinets
Beyond Paint All-in-One Refinishing Paint, No Sanding,

- ✓ No sanding or priming needed
- ✓ Fast drying, durable finish
- ✓ Works on many surfaces
- ✕ Slightly textured finish
- ✕ Limited color options
| Coverage | One pint covers 5-7 cabinet fronts and facings with 2 coats |
| Application Surface Compatibility | Wood, metal, plastic, laminate, formica, glazed tile, fabric, RV substrates, previously painted surfaces |
| Drying Time | Quick drying (exact time not specified) |
| Finish | Matte, slightly textured surface |
| VOC Content | Low-VOC formula |
| Formulation | Water-based acrylic, paint and primer in one |
Ever spent ages sanding and stripping just to get that tired-looking laminate surface ready for a fresh coat? I’ve been there, frustrated with the mess and the time it takes.
Then I tried Beyond Paint All-in-One Refinishing Paint, and honestly, it changed the game.
This paint is a breeze to work with. It’s self-leveling and leaves a smooth, matte finish without those annoying roller marks.
I didn’t have to remove the cabinet doors or strip the surface—just a quick clean, and I was ready to go. The coverage is impressive; one pint easily covered two cabinet fronts with two coats, saving me both time and money.
What I really appreciated was how quickly it dried. After just a few hours, I could see the transformation.
Plus, the low-VOC formula made me feel safe working indoors. It adheres well to laminate, plastic, and even glazed tiles without any priming or sanding.
The durability is noticeable; it feels weatherproof and scrubbable, perfect for high-traffic areas or outdoor furniture.
Overall, this product made my DIY project simple and stress-free. No more dust, no more waiting forever between coats, and the finish looks professional.
It’s a versatile, reliable option for anyone wanting a quick upgrade on tricky surfaces.
Roberts Palette Quick-Repair Putty Dark Brown

- ✓ Easy to apply and sand
- ✓ Fast-drying
- ✓ Blends well with dark floors
- ✕ Limited to small repairs
- ✕ Not for large damage
| Type | Acrylic-based repair putty |
| Color | Dark Brown |
| Application | Filling gaps, nicks, scratches on wood, laminate, vinyl flooring |
| Drying Time | Fast-drying, paintable and sandable after application |
| Shelf Life | Two years |
| VOC Content | Low VOC, environmentally safe |
Ever try to fix a small nick on your laminate floor and end up with a mess that’s obvious even after painting? That’s exactly where the Roberts Palette Quick-Repair Putty Dark Brown comes in.
I grabbed a tube after noticing a few scratches on my dark wood laminate, and I was surprised how straightforward it was to use.
The putty’s texture is smooth and easy to work with right out of the tube. It’s acrylic-based, so it doesn’t shrink or crack as it dries, which is a huge relief.
I applied a tiny bit to the damaged area, and it spread easily with just a little tool I had on hand.
What really stood out is how fast it dried — within about 30 minutes, I could gently sand it down to match the floor’s surface. No more waiting all day or risking smudges.
Plus, it takes paint well, so I was able to blend it seamlessly with my floor color.
Handling was a breeze, thanks to its no-shrink formula and easy sandability. I also appreciated that it’s low VOC and safe for indoor use.
The two-year shelf life means I can keep some around without worries about it drying out or going bad.
Overall, this putty made repairing small damages quick and simple, saving me from expensive floor replacements or awkward patches. It’s a solid choice for anyone wanting a natural, clean repair that doesn’t stand out.
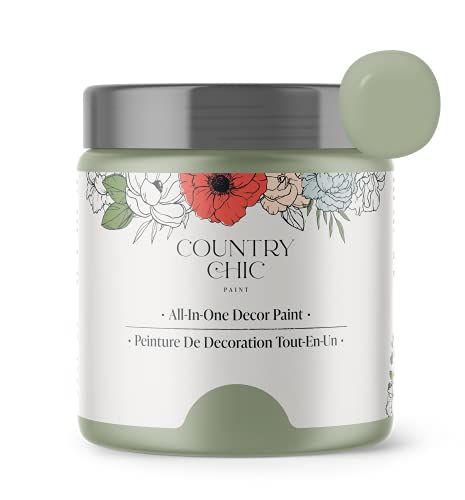
Country Chic Sage Advice Chalk Paint 16 oz
- ✓ All-in-one formula
- ✓ Fast drying
- ✓ Matte, distressed-ready finish
- ✕ Not super glossy
- ✕ Limited for high-traffic use
| Coverage | 16 oz (473 ml) per container, suitable for multiple furniture projects |
| Application Surface Compatibility | Wood, metal, laminate, and other surfaces |
| Drying Time | Approximately 30 minutes to dry to a chalky matte finish |
| Finish | Chalky matte with self-leveling properties for a smooth surface |
| Durability | Long-lasting with excellent adhesion and resistance to wear |
| VOC Content | Ultra-low VOC, certified safe per European Toy Safety Standards |
Finally got my hands on the Country Chic Sage Advice Chalk Paint after hearing so much about its all-in-one formula. I was curious if it really lives up to the hype, especially for tricky surfaces like laminate furniture.
The moment I opened the jar, I noticed the rich, earthy green shade that’s perfect for a classic, muted look.
Applying it was surprisingly easy. The self-leveling formula meant I didn’t have to fuss over brush strokes, and the paint dried within just 30 minutes, leaving that beautiful chalky matte finish.
I love how quick it was to get a decent result, even on a piece I hadn’t prepped much. The built-in primer and top coat made the whole process less stressful—no need for multiple layers or extra steps.
The coverage was impressive; I managed to cover a medium-sized dresser in just a couple of coats with minimal prep. The finish felt durable right away, and I appreciated how well it adhered to the laminate surface without peeling or chipping.
Plus, knowing it’s eco-friendly and free from harsh chemicals made the process even more enjoyable. I did some distressing after drying, and the matte look held up beautifully, giving it that vintage vibe I was after.
If you’re looking for a versatile, reliable paint that transforms furniture effortlessly, this is a solid pick. It’s perfect for DIYers who want professional-looking results without the fuss.
Just keep in mind, it’s not ideal for ultra-high-traffic surfaces without a clear topcoat for extra durability.
Black Wood Furniture Paint 7.1oz, Water-Based, Matte Finish

- ✓ Easy no-sand application
- ✓ Fast drying, durable finish
- ✓ Low odor, safe for home use
- ✕ Requires priming on slick surfaces
- ✕ Curing takes up to a week
| Type | Water-based matte finish wood paint |
| Color | Black |
| Volume | 7.1 ounces (210 ml) |
| Drying Time | Light use in 1 day, fully cures in 7 days |
| Coverage | Exceptional coverage with multiple coats |
| Application Surface Compatibility | Suitable for furniture, interior woodwork, doors, trim; priming recommended for glass, ceramic, metal surfaces |
There’s a common belief that transforming old, tired furniture requires a lot of prep work—sanding, priming, sealing. But with this black wood furniture paint, I found that’s simply not the case.
When I brushed it onto a scratched-up coffee table, I was surprised by how smooth and opaque the coverage was. It didn’t require any sanding beforehand, just a quick stir and straight application.
The matte finish gave it a sleek, modern look that totally refreshed the piece.
The paint dried quickly to the touch, and I was able to add multiple coats within the same day. Plus, it’s water-based, so cleanup was a breeze and the smell was minimal—no harsh fumes filling my workspace.
One thing I appreciated is how well it adhered to different surfaces, from my old wooden dresser to a few decorative metal accents. It’s versatile enough for cabinets, tables, or even stairs.
The color retention impressed me—no peeling or fading after a few weeks of use.
It’s also good to know that if you want to paint on slick surfaces like glass or ceramic, priming first will give you even better results. Overall, this paint makes DIY furniture updates accessible, quick, and relatively mess-free.
That said, it’s not a miracle cure for every surface—it’s best for wood and similar materials. But for a quick, affordable upgrade, I’d definitely recommend giving it a try.
Heirloom Traditions All-in-One Paint Oyster Taupe Quart

- ✓ No sanding or priming needed
- ✓ Easy to apply and smooth
- ✓ Versatile for multiple surfaces
- ✕ Color may vary on screens
- ✕ Results depend on prep
| Paint Type | All-in-One, no sanding or priming required |
| Finish | Low Luster, Velvet Sheen |
| Application Surfaces | Walls, doors, cabinets, counters, furniture, metal, glass, ceramics, tile, fabrics, vinyl, leather |
| Color Options | Includes 30 featured and newest released color card; accurate color preview with sprayed-on samples |
| Interior/Exterior Use | Yes, suitable for both indoor and outdoor applications |
| Durability | Designed to be durable and stretchable for various surfaces |
The moment I opened the Heirloom Traditions All-in-One Paint in Oyster Taupe, I was impressed by how smooth the container felt in my hand—solid but lightweight. As I dipped my brush into the quart, the consistency was just right, not too thick or runny, making application feel effortless.
What really caught me off guard was how easily it covered my old laminate cabinet door with just one coat. No sanding or priming needed, which saved me so much time and mess.
The velvet sheen finish gave everything a soft, sophisticated look that felt high-end.
Applying it was a breeze, especially since it’s all-in-one. I simply brushed it on, and it spread evenly without streaks or clumps.
I also tested it on a small metal piece, and it adhered well—no peeling or cracking after drying. The low luster finish is perfect if you want a subtle, elegant glow without too much shine.
The color itself, Oyster Taupe, is versatile and warm, matching many decor styles. Keep in mind, digital screens might not show the true hue, so the included color card was a handy guide.
I appreciated the flexibility to use it indoors or outdoors, which makes it a real all-rounder for different projects.
One thing to note: while durable, results can vary depending on surface prep and application. Overall, this paint really simplified my project, delivering a beautiful finish without the fuss of traditional painting steps.
What is Wood Laminate and Why is It Popular for Furniture?
Wood laminate is defined as a manufactured product made by bonding layers of wood veneer or paper with resin to create a durable surface that mimics the appearance of solid wood. This composite material is commonly used in furniture, flooring, and cabinetry due to its affordability and versatility.
According to the American Institute of Architects, laminate materials combine aesthetics with practicality, making them a popular choice in both residential and commercial settings. Laminates are designed to resist scratches, stains, and moisture, which significantly extends their lifespan compared to natural wood.
Key aspects of wood laminate include its layered construction, which typically consists of a core layer made from particleboard or medium-density fiberboard (MDF) covered with a decorative layer. This layered design not only enhances durability but also allows for a wide range of finishes and styles, making wood laminate adaptable to various design aesthetics. The production process for laminates often employs eco-friendly practices, using recycled materials and sustainable sources, which appeals to environmentally conscious consumers.
This popularity is further reflected in market statistics; the global laminate market was valued at approximately $18 billion in 2021 and is projected to grow significantly in the coming years due to rising demand for cost-effective, stylish furniture solutions. Additionally, the ease of maintenance and repair associated with wood laminate furniture makes it a practical choice for households and businesses alike.
The impacts of wood laminate are numerous; it enables a broader demographic to access aesthetically pleasing furniture options at lower costs, thus democratizing design. Moreover, its durability means that items made from laminate can withstand everyday wear and tear, making them ideal for high-traffic areas in homes and offices. The application of wood laminate is not limited to furniture; it is also widely used in kitchen cabinets, countertops, and wall panels, showcasing its versatility.
When it comes to painting wood laminate, selecting the best paint is crucial for achieving a lasting finish. Products specifically formulated for laminate surfaces, such as acrylic or spray paints, can provide superior adhesion and durability. Proper surface preparation, including cleaning and sanding the laminate, can significantly enhance paint adherence, ensuring that the final result is both visually appealing and long-lasting. Additionally, using a primer designed for glossy surfaces can further improve the outcome of paint applications on laminate furniture.
What Types of Paint Work Best on Wood Laminate?
When considering the best paint for wood laminate, several types of paint stand out for their adhesion, durability, and finish.
- Acrylic Paint: Acrylic paint is water-based and offers excellent adhesion to laminate surfaces. It dries quickly and is available in various finishes, making it ideal for both indoor and outdoor projects.
- Chalk Paint: Chalk paint is known for its matte finish and easy application, which typically requires minimal preparation. It adheres well to laminate and can be distressed for a vintage look, adding character to furniture.
- Spray Paint: Spray paint provides a smooth, even coat and is suitable for intricate designs or furniture pieces with detailed surfaces. It’s important to choose a spray paint specifically formulated for plastic or laminate to ensure good adhesion.
- Oil-Based Paint: Oil-based paint offers excellent durability and a hard finish, making it suitable for high-traffic areas. However, it requires proper ventilation during application due to its strong fumes and longer drying time.
- Primer and Paint Combo: Using a primer and paint combination can provide superior adhesion on laminate surfaces. This type of product often includes a bonding agent that helps the paint stick better to the slick surface of laminate.
What Are the Advantages of Using Oil-Based Paint on Wood Laminate?
The advantages of using oil-based paint on wood laminate include durability, finish quality, and adhesion properties.
- Durability: Oil-based paints are known for their toughness and resistance to wear and tear. They create a hard finish that can withstand the rigors of daily use, making them ideal for surfaces like wood laminate that may experience frequent contact and abrasion.
- Finish Quality: The smooth, glossy finish provided by oil-based paints enhances the appearance of wood laminate. This type of paint levels out beautifully, resulting in a professional-looking surface that can elevate the overall aesthetic of furniture or cabinetry.
- Adhesion Properties: Oil-based paints adhere well to non-porous surfaces such as wood laminate. This strong adhesion reduces the risk of chipping and peeling, ensuring that the paint stays intact for a longer period, which is crucial for maintaining the look of the laminate.
- Color Retention: Oil-based paints tend to retain their color over time without fading as quickly as water-based options. This characteristic is particularly beneficial for wood laminate surfaces exposed to sunlight or harsh lighting, ensuring that the paint remains vibrant for years.
- Ease of Cleaning: Once cured, oil-based paints are easier to clean and maintain. They are resistant to stains and can be wiped down without damaging the paint, making them suitable for high-traffic areas or surfaces that are prone to spills.
What Are the Benefits of Choosing Water-Based Paint for Wood Laminate?
Choosing water-based paint for wood laminate offers several significant benefits that enhance both application and durability.
- Low VOC Emissions: Water-based paints typically contain lower levels of volatile organic compounds (VOCs) compared to oil-based alternatives, making them safer for indoor air quality. This feature is especially important for home environments where prolonged exposure to harmful fumes can lead to health issues.
- Quick Drying Time: Water-based paints dry much faster than oil-based paints, allowing for quicker project completion. This is beneficial for DIY enthusiasts and professionals alike, as it enables multiple coats to be applied in a shorter timeframe, speeding up the overall painting process.
- Easy Cleanup: With water-based paints, cleaning brushes, rollers, and spills requires just soap and water, making the cleanup process hassle-free. This convenience encourages more people to undertake painting projects without the worry of dealing with harsh solvents.
- Flexibility and Durability: Water-based paints have a degree of flexibility that helps them resist cracking and peeling as the wood laminate expands and contracts with temperature changes. This durable finish is ideal for surfaces that may experience varying levels of wear and tear.
- Wide Range of Finishes: Water-based paints are available in a variety of finishes, from matte to glossy, giving users the flexibility to achieve their desired aesthetic. This versatility allows for creative expression, making it easier to match the paint to existing decor.
- Environmental Benefits: The use of water-based paints is more environmentally friendly, as they produce fewer harmful byproducts during manufacturing and application. This aligns with a growing consumer preference for sustainable and eco-friendly products.
What Steps Should Be Taken to Prepare Wood Laminate for Painting?
Preparing wood laminate for painting involves several essential steps to ensure a smooth and lasting finish.
- Clean the Surface: Thoroughly clean the laminate surface to remove dust, dirt, oils, or any residues that might interfere with paint adhesion.
- Sand the Surface: Lightly sand the laminate with a fine-grit sandpaper to create a texture that helps the paint adhere better.
- Apply a Primer: Use a suitable primer designed for laminate surfaces to create a bonding layer for the paint, enhancing durability and coverage.
- Choose the Right Paint: Select a high-quality paint formulated for laminate materials, typically an acrylic or chalk paint, which offers good adhesion and a smooth finish.
- Use Proper Application Techniques: Apply the paint using a foam roller or brush to avoid streaks, and consider multiple thin coats for an even finish.
- Allow Adequate Drying Time: After painting, let the laminate cure properly according to the paint manufacturer’s instructions to ensure durability and prevent damage.
Thoroughly cleaning the surface removes any contaminants that could prevent the paint from adhering properly, ensuring a smoother application.
Lightly sanding the surface helps create a key for the primer and paint to grip onto, which is crucial for a laminate’s slick finish.
Applying a primer specifically designed for laminate surfaces helps the paint bond effectively and provides a uniform base color, which can greatly improve the final appearance.
Choosing the right paint is critical, as not all paints adhere well to laminate; using paints that are specifically formulated for such surfaces will yield the best results.
Using proper application techniques, such as rolling or brushing, helps avoid air bubbles and streaks, achieving a professional-looking finish.
Finally, allowing adequate drying time is essential, as it ensures the paint cures correctly and provides a durable coating that withstands wear and tear.
How Should You Clean Wood Laminate Before Painting?
Proper cleaning of wood laminate before painting is crucial for achieving a smooth and lasting finish.
- Dusting: Start by dusting the surface with a microfiber cloth to remove loose dirt and debris.
- Cleaning Solution: Use a gentle cleaning solution, like a mixture of warm water and a few drops of dish soap, to wipe down the laminate.
- Rinsing: After cleaning, rinse the surface with a damp cloth to remove any soap residue that could interfere with paint adhesion.
- Drying: Allow the surface to dry completely before applying any paint or primer.
- Sanding (optional): Lightly sand the laminate with fine-grit sandpaper to create a better surface for paint adhesion.
Dusting is the first step, as it helps eliminate any surface particles that could affect the paint’s ability to bond with the laminate. A microfiber cloth is ideal for this purpose because it traps dust without scratching the surface.
For the cleaning solution, a mixture of warm water and dish soap is effective in breaking down any oils or residues while being gentle enough not to damage the laminate. Be sure to apply the solution with a soft cloth and avoid soaking the surface.
Rinsing is an important step to ensure that all cleaning agents are removed, as any leftover soap can create a barrier that prevents paint from adhering properly. Use a clean, damp cloth to wipe the surface thoroughly.
Drying completely is essential, as any moisture can lead to issues with paint application and adhesion. It’s recommended to wait at least a few hours, or until the laminate feels dry to the touch.
Light sanding can be beneficial, especially if the laminate has a glossy finish. This helps to create tiny scratches on the surface, which can improve the grip of the paint, but be careful not to sand too aggressively to avoid damaging the laminate.
Why is Priming Essential for Painting Wood Laminate?
Priming is essential for painting wood laminate because it ensures proper adhesion of the paint to the surface, allowing for a durable and long-lasting finish.
According to a study published in the Journal of Coatings Technology and Research, the use of a primer significantly enhances the bonding properties of paint on non-porous surfaces such as laminate, which is typically smooth and glossy. This is crucial as standard paint may not adhere well to laminate without the aid of a primer, leading to peeling or chipping over time.
The underlying mechanism involves the primer’s formulation, which often contains bonding agents that create a suitable texture for the paint to grip onto. When applied, the primer fills in small imperfections and creates a slightly porous surface that helps the paint molecules to interlock, thereby increasing adhesion. This chemical and physical interaction is vital for ensuring that the paint adheres properly and maintains its integrity over time, especially in high-usage areas or where moisture may be present.
Additionally, primers can help to prevent bleed-through from the laminate surface, which may contain oils or other contaminants that could affect the final appearance of the paint. Without a primer, these elements can cause discoloration or uneven finishes, which is particularly problematic when using lighter colors. Therefore, using the best paint for wood laminate in conjunction with a suitable primer not only enhances the aesthetic appeal but also prolongs the lifespan of the painted surface.
What Techniques Yield the Best Results When Painting Wood Laminate?
When painting wood laminate, several techniques can yield the best results:
- Surface Preparation: Properly preparing the laminate surface is crucial for paint adhesion. This involves cleaning the surface thoroughly to remove any dirt or grease, followed by sanding it lightly to create a texture for the paint to grip onto.
- Using a Primer: Applying a high-quality primer specifically designed for laminate surfaces can significantly enhance paint adherence. Primers help seal the surface and prevent the paint from chipping or peeling, ensuring a smooth and even finish.
- Choosing the Right Paint: The best paint for wood laminate is typically a durable, high-quality acrylic or latex paint. These types of paints are flexible and adhere well to laminate surfaces, providing a long-lasting finish that resists wear and tear.
- Applying Multiple Coats: For the best results, apply multiple thin coats of paint rather than a single thick coat. This method allows each layer to dry properly and reduces the risk of drips and uneven surfaces.
- Using a Foam Roller or Spray Gun: To achieve a smooth finish, consider using a foam roller or a spray gun for application. Foam rollers minimize brush strokes, while spray guns can provide an even coat without brush marks, making them ideal for larger projects.
- Finishing with a Clear Coat: After the paint has dried, applying a clear protective topcoat can enhance durability and protect against scratches and stains. Choose a water-based polyurethane for a clear finish that won’t yellow over time.
What Are Common Mistakes to Avoid When Painting Wood Laminate?
When painting wood laminate, avoiding common mistakes is crucial for achieving a smooth and lasting finish.
- Skipping Surface Prep: Failing to properly clean and sand the laminate surface can lead to poor paint adhesion. Laminate surfaces are often glossy, and without adequate preparation, the paint may peel or chip over time.
- Choosing the Wrong Paint: Using standard latex paint instead of a paint specifically designed for laminate can result in a subpar finish. Look for paints labeled as suitable for laminate or use a primer designed for non-porous surfaces to enhance adhesion.
- Neglecting Primer: Skipping primer can cause the paint to not stick well and may result in an uneven finish. A good bonding primer can also help to block stains and create a smoother surface for the paint application.
- Using the Wrong Application Tools: Using brushes or rollers that are not suited for smooth surfaces can leave brush strokes or uneven coverage. Foam rollers or high-density brushes are better options for achieving a sleek finish on laminate.
- Rushing the Process: Trying to cut corners by applying multiple coats too quickly can lead to drips and an uneven look. It’s essential to allow adequate drying time between coats for the best results.
- Ignoring Environmental Conditions: Painting in humid or overly hot conditions can affect how the paint dries and adheres to the surface. It’s best to paint in a controlled environment to ensure optimal curing and finish quality.
- Forgetting to Seal the Finish: Not applying a protective topcoat can leave the paint vulnerable to scratches and wear. A clear sealer or topcoat can provide additional durability and enhance the longevity of the paint job.